main
software

keyboard
music
personal
missives
books
|
main |
software |
keyboard |
music |
personal |
missives |
books |
Update
I've gotten quite a response to this page, including many good suggestions. Dozens of people asked "Why not use two keyboards and a Y adaptor" instead of bothering to hack a keyboard to pieces?
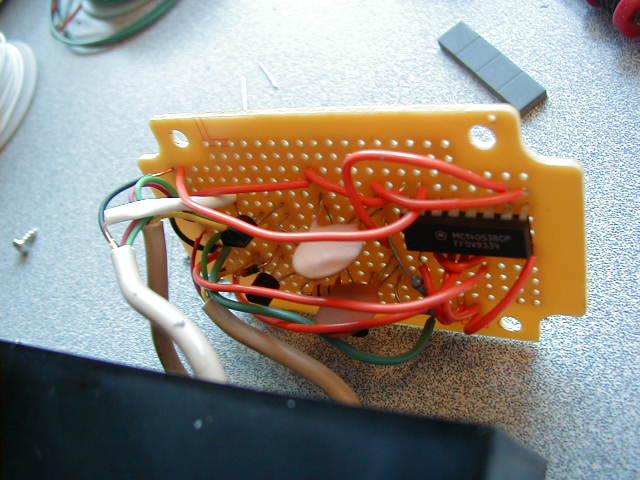
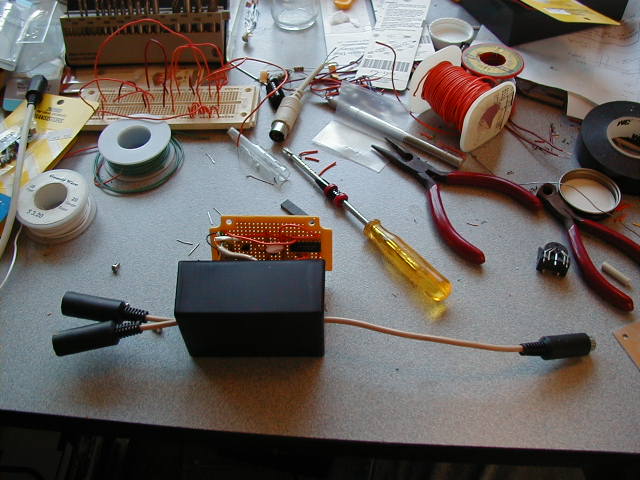
A Y adaptor is not trivial since the keyboard port isn't designed for it, however Gerard Pinzone knew the solution: a Y adaptor circuit is posted at this web site. Very cool. This circuit works well. I use it alternate between the split keyboard and a normal keyboard. This help prevent my arms getting tired of one position. Here's a photo of the circuit board, and the complete adaptor.
I suspect a full-sized keyboard on each side would be awkward, but I haven't tried it. One correspondent believes the circuit may not work well for that purpose, because of timing issues (one keyboard is temporarily blocked when a key is pressed or released on the other). I recently noted a commercial Y adaptor is now available. I don't have a link for it, yet.
spRed suggested a safer and more accurate way to cut pcb: To cut the PCB in half, I used an exacto knife with the little saw blades (just a few bucks for a pack of them). ... they tear fairly quickly through the board, and you can make very exact cuts without wearing safety goggles.
Several people asked if I was interested in selling such keyboards. The idea doesn't appeal to me much (... at all, really). The margin would be pretty slim, and I like to spend my energy on problem solving, not production. While I'm not fond of "ergo" product manufacturers, Andrew Tannenbaum pointed out a commercial design that is completely split, and selling for one quarter of what other split designs cost. In the interest of promoting reasonable pricing, I'm linking their product . It appears that it could be mounted like mine unmodified, or perhaps requiring an easy cable extension (the cable length is not apparent in the photos).
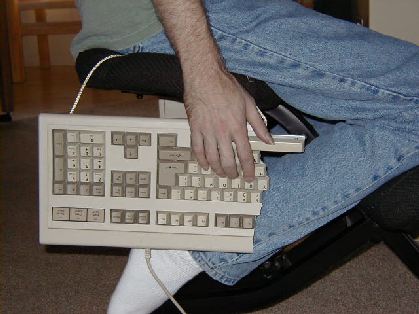
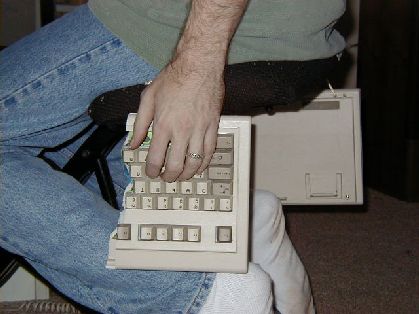
The keyboard
After suffering symptoms of an RSI, I investigated "ergo" keyboards. It turns out that an "ergo" stamp is an excuse to charge truly absurd amounts of money of very common equipment... like $500 for a keyboard, or $200 for a mouse.
I also found that no one had quite what I wanted. Part of my symptoms were pains in my elbows from being constantly bent, and pains in my wrists from being held rotated, in the plane of the keyboard. I wanted a keyboard which allowed my wrists and arms to be in their relaxed positions, i.e. at my sides. What I imagined was, basically, a saddle-bag keyboard.
This in mind, I visited a surplus computer parts store, and bought two keyboards for $7/each. Then I took a jig saw to one of them.
I can now report that it is possible to cut pc board in two with a jig saw and still have a functional circuit. :) I used the IDE plugs from a fried motherboard, and a spare IDE cable (which came with the last hard drive I purchased) to wire the two halves together.
Some details of the process are below.
I make NO CLAIMS that this design will help any typing injuries you are experiencing, nor do I claim that this design won't hurt you if used excessively.
I find that it's comfortable for me.
The finished product:

 |
 |
Performing the hack:
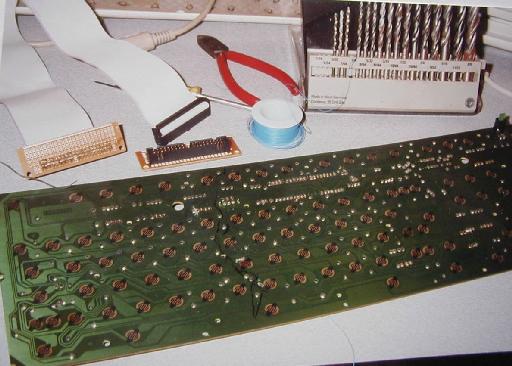
Keyboard technology has changed many times. The two keyboards I ended up with were very different, when I opened them up. The more modern one had no pcb, only printed plastic sheets. I haven't figured out, yet, how to make contact with these. If anyone knows, drop me a line. You can just barely see one of these sheets in the top of the next picture.
The keyboard I used was older, and had real solid pcb, which I was able to
solder to with wire-wrap wire (small solder joints were important near the cut
edge, where there was little room). Here you can see the line I planned to cut
(avoiding components on the opposite side), and the IDE plugs and cable. I
chose to put "6" on the left, and the spacebar on the right.
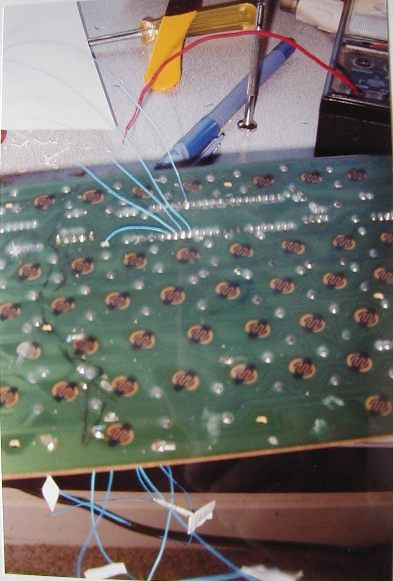
To minimize the number of wires I needed between the two halves, I compiled a list of nodes that were to be cut, and eliminated duplicates (which frequently had to be joined locally, if the cut was going to isolate parts of a node).
I did all of the wiring before cutting the board, because matching
traces after the fact would have been much harder. Also, this way I could
test for shorts by plugging the two halves together while the board was
still in one piece: if it still worked with the cable connected, nothing
was shorted.
I used a jig saw to do the cut, which I don't recommend, especially if you don't know how to safely use power tools. Power tools are dangerous. A reader suggests using one of the exacto knives with miniature saw blades. I'm leaving the following notes on using a jig saw, but you're probably better off with the exacto knife solution.
Cutting pcb is about like you might expect. High blade speeds and slow forward speeds are less likely to rip circuitry off the board. This is particularly important when stopping: back away from the cut before releasing the trigger, or the decelerating blade will rip up traces or fracture the pcb.
Cutting the plastic frame of the keyboard required slower blade
speeds. My initial cut -- all the way across the keyboard -- resealed
itself due to the heat of the blade. It wasn't even noticeably weakened, though
I'd passed a blade completely through it. It was kind of surreal. A slower blade speed did the
job.
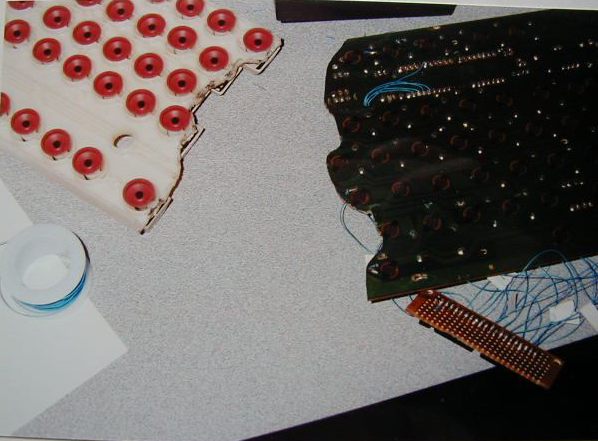
Here you can see the entire technology: a pcb, little rubber key
pads (each holding a conductor at their tip), and a plastic frame to hold
the keys, and to hold the pads in place. There's also a front and back cover,
not shown.
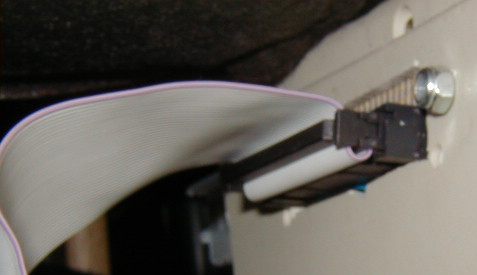
Mounting holes were cut in the cover for the IDE plugs. Sandwiching it in was a little iffy,
and the keyboard bulges a bit around them, but since it's not sitting flat it
doesn't matter. At this point the keyboard could be reassembled, and connected
with the IDE cable.
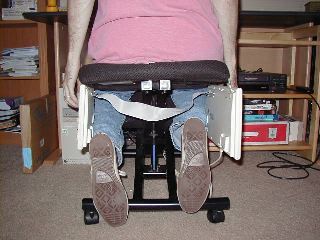
I haven't fully resolved this issue. I ended up suspending the keyboard much like a saddle-bag, with a thin rope over the chair. This leaves the keyboard free to wobble. With the wacky chair, the keyboards rest against my feet, which solves the problem.
This page may be redistributed under the terms of the OpenContent License.