Designing Pieced Blocks for Quilts
Preparation
Depending on the age of the students or their interest in quilt design, you will need to decide whether you want to have the students all piece the same block or design their own blocks. I give students as much choice as possible about the type and style of block no matter what I decide. If every student is piecing the same block, it can simplify things a great deal. You can use the following ideas to pick a block or have each child design his or her own.
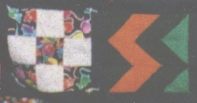
The first thing I do to prepare students to design a block is to teach them the basic elements of a traditional block. We first looked at different blocks and discussed how some had four main sections and some had nine. (We didn't look at 16 patch blocks, as I had already decided that would be too much work for the students.) We then discussed how each block was made up of a combination of squares and triangles. We made a list of color combinations we might like to have in our quilt. If we are going to piece a single block we reach consensus on which block we want to do. I often bring in pictures of a variety of possible blocks.
At home, I cut a variety of squares and triangles using a rotary cutter and fabric from my collection. To cut the shapes so that they will fit together when sewn, first figure the size of your finished block. Divide that measurement by three for a nine patch block (or divide by two for a four patch block) and add 1/2 inch to figure the size of squares to cut. To figure the size of most triangles, divide that measurement by three for a nine patch block (or divide by two for a four patch block)and add 7/8 inch. Cut squares this size and then cut the squares on the diagonal to create triangles.
For instance:
- Our finished sized blocks were 7 1/2 inches.
- We made nine patch blocks. 7 1/2 divided by 3 plus 1/2 inch is 3 inch squares.
- For the triangles, 7 1/2 divided by 3 plus 7/8 inch was 3 3/8 inch. I cut 3 3/8 inch squares which I then cut on the diagonal. So for every 3 3/8 inch square I cut, I made two triangles.
I also mark quarter inch seam allowances in pencil on the back of each square and triangle. Older children are able to mark their own seam allowances on the back of the pieces after they have selected the pieces they are using for their blocks.
The Next Day
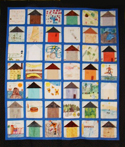
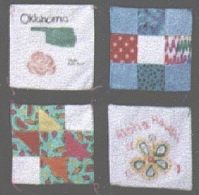
I spread the cut triangles and squares all over a table and students came up and picked pieces to design with. We discussed that the more triangles a student used, the more hand sewing they would be doing later. Each student designed their block and drew a sketch of the finished design to use as they sewed. I did not give any specific instructions for how students should make the sketch, so it was a great experience in problem solving. Whenever a student had trouble deciding which pieces to sew next, we would refer to their sketch.
I explained to students how to sew the pieces together using the diagram below. The basic directions were to sew the triangles into squares, sew the squares into rows, and sew the rows into a finished block. I explained hand sewing next.
© Copyright 1996-2012 Heddi Craft