Tying a quilt
Materials needed
- Curved needles- these can be found at most craft or discount stores
- Embroidery floss- I usually choose a color that compliments the quilt or I let the kids pick the color

Advanced Preparation
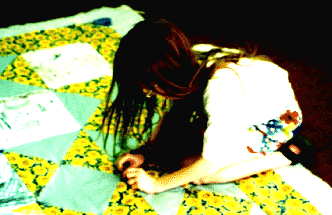
You will either need to quick turn the quilt or lay out the backing, batting, and top on a floor or large table. If I am using a floor, I tape down each layer so it is relatively taut. Tying is a lot more forgiving than hand quilting, so you don't have to worry as much about bunching or wrinkles. Even if the quilt is quick turned, I will often tape down all four corners to keep it straight. If you are using a table, you can use bulldog clips to clamp the layers to a table to keep them straight. Cut the floss into about 18" lengths so it is ready to use. One piece will tie two or three corners. Decide on a plan for where the students will tie the quilt. If you are using polyester batting, the ties can be 8-10 inches apart.
The Lesson

The first thing I do is teach the students how to tie a square knot. Everyone unties their shoelaces or borrows a friend's shoe and we practice. Basically, first the string in the right hand goes over the left hand string and is looped through, just like when you start to tie your shoe laces. The second part is harder. Now the original right hand string is in the left hand and the left hand string is in the right hand. The second step is to place the left hand string (originally from the right hand) over the over the right hand string (originally from the left hand) and loop it through. Before pulling everything tight, it should look like the diagram. The trick to knowing it is right is the not quite figure eight effect with two strings under a loop and two strings over the other loop.
Why go to all this trouble? Well a knot that goes right over left and right over left again is called a "granny knot" and it won't stay tied. A square knot will. Try it yourself with some slippery embroidery floss. If you are lucky, there will be some boy or girl scouts in your class who have learned to make square knots and can help the other kids!
A kid has to show me twice in a row that they can make a square knot on their shoelace before they get a curved needle threaded with embroidery floss-- all six strands, but not doubled over and not knotted on the end. The next step is learning to use that curved needle. I teach the kids to push the needle into the quilt where they want to tie and poke the tip until they can hear whatever is under the quilt. ( I tell the students to listen for the sound of the tabletop or the carpet being "scratched" by the needle so that they know that the needle has gone through all three layers.) Use the curve of the needle to push back up through the quilt about 1/2 inch from where they started. Pull the floss through until there is about a four inch tail and then take another stitch directly over the first one-- go in the same spot and come out the same spot. Cut off the floss about four inches up so you have two tails of about four inches long. Tie a square knot and cut off the ends to about one inch. Let the students know how many places you expect them to tie and where.
When you are finished
Go over the quilt and make sure that everything has been tied. If you have been working on carpet, the quilt may be sewn to the floor in some places. Cut the carpet not the quilt! (Or cut the tie and redo it!) At this point either your quilt is finished if you have quick turned it or you will need to put on a binding.
© Copyright 1996-2012 Heddi Craft

