A Tale of Two Curling Edges
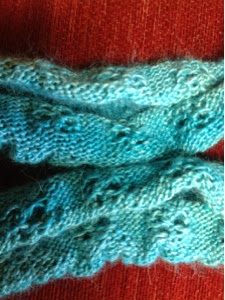
 This curly mess is a new shawl/cowl that I’ve been working on instead of reworking the Raspberry shawl. It’s called Verdu and is worked in the round with my last skein of the now discontinued semi-solid Daidem yarn from Knit Picks. I was imagining a sort of stretchy, deep cowl that I could pull round my shoulder like a shawl, but even before I cast on, I realized I only had enough yarn to make a cowl. No problem, I thought, maybe it would still make a skinny thing to go around my neck and I can test the pattern for a deeper one later. Plus, as I started in I got the stripes I was so surprised about last time I used this yarn. It looks just mottled on the skein and in a ball, but when you start to knit, distinct lines of color show up. The first few color changes were at ideal points, the next few, not so much.
I noticed the bottom edge was curling as I knit up, but things got quite shocking when I cast off, as you can see. I couldn’t even put the thing around my shoulders because the curl was so pronounced.
I went online wondering why the mad curling had happened and found my exact situation on the ever-wonderful TechKnitting blog (here quoted at length):
The chain of logic behind non-curling stitch bands is this: the garment designer notices, correctly, that stockinette stitch curls like mad, but that garter stitch (seed stitch, ribbing etc.) does not curl or flip. “Ah ha!” says the designer, “I will put a garter stitch band on this stockinette item I am designing, and then the stockinette fabric will be tamed, and the garment edge will not flip or curl.”
This is a logical conclusion, and, in fact, garment edge itself will not curl up. However, that does not mean that the GARMENT will not curl up. As disappointed knitters in knitting forums all over the internet can testify, the most likely result of a garter stitch band on a stockinette stitch garment is that the bands either flip up, or the whole garment continues to curl, taking the “non curling edge” right along with it.
Solutions: Reworking the pattern edges, blocking the heck out of it (in progress as I write), and careful application of steam, heat, and/or pressure. (For other types of garments there are a few more, but these are the ones that would work for my project. Find the full discussion on TechKnitting.)
Moral: The more I learn, the more I need to learn.


