Browsed by
Category: teaching

Happy New Year 2019

Happy New Year 2019

Happy new year!  If you are a regular reader of my blog, I apologize for the long period of silence this fall.  This year I started teaching again in a 50% teaching position which seems to take 70% of my time!  I have really enjoyed being back in the classroom and I’m lucky to be working at a small school where I get to spend time with both younger and older students!

Now that my routine has settled there, I’m hoping to get back to regular blogging.  So let me catch you up on the knit-worthy goings on in the last three months!

I’ve been continuing to teach classes at Knit Sew Make, a teaching studio I started in the spring of 2018 with two other fiber artists.  For January and February, I’m teaching a Knitter’s Workshop class for self directed projects and a Crochet Mandalas class.  Check out our class registration website for a list of all our classes.

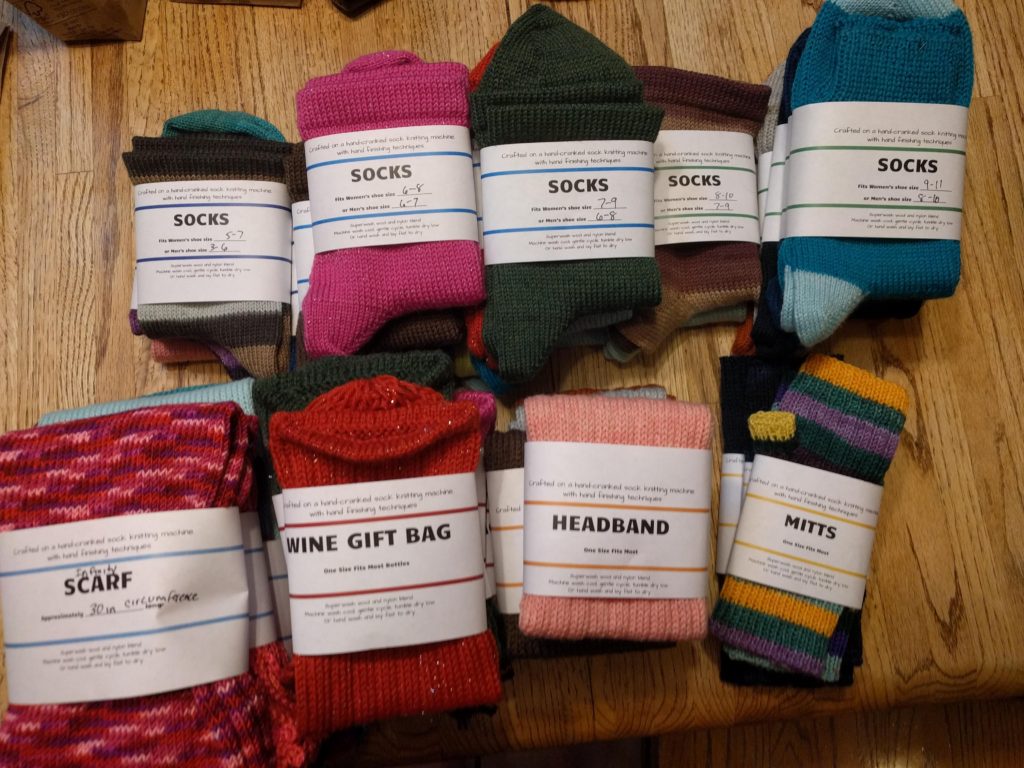
I also used my Erlbacher Gearhart hand crank sock machine to make over 50 items for our local Homeless Garden Project Holiday Store that benefits programs for the homeless here in Santa Cruz, CA.  I learned even more about what my sock machine can do and I’m planning to release some checklist style patterns for circular sock machines this spring.

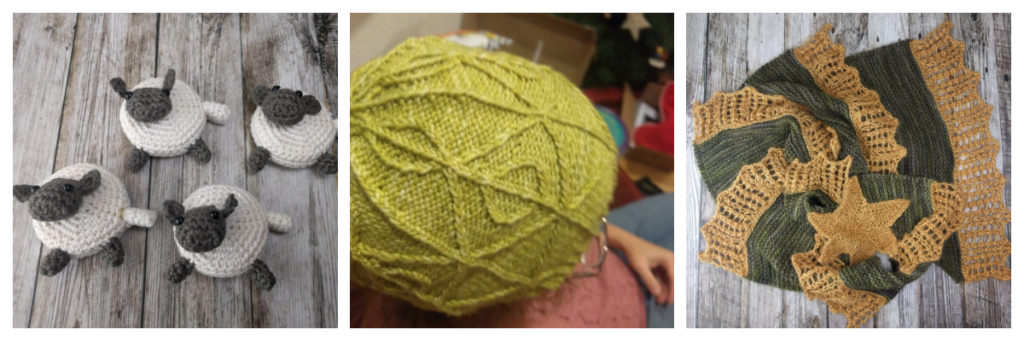
I was a participating designer for the Indie Design Gift-A-Long and I helped moderate the Hands forum this year.  If you don’t know about this great event on Ravelry, join the group and keep your eyes open in late November 2019 for the beginning of the sale and Gift-A-Long.  It’s full of friendly people and starts with a sale of patterns from literally hundreds of independent designers!  I managed to complete three great patterns by other indie designers this year:  I made several Sheep Tape Measure Covers by Justyna Kacprzak as gifts, I completed the Sunstone hat by Triona Murphy, and I made the Christmas Tree Wrap by handmade by SMINÉ.

I also have FOUR new patterns that came out this fall!

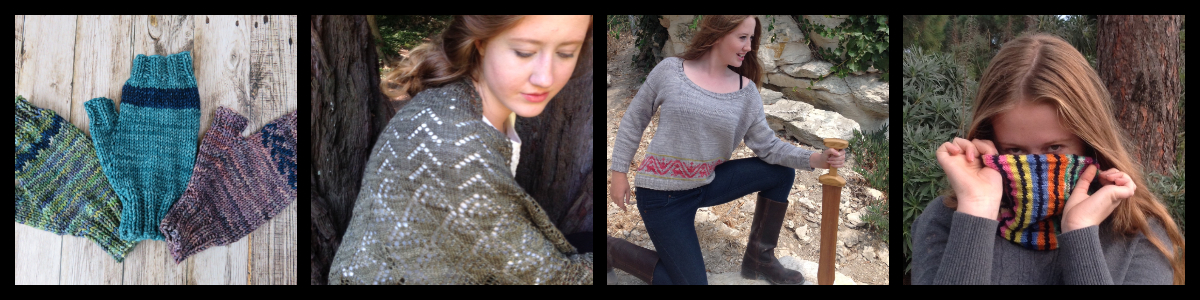
The Simple Colorwork Mitts are an easy to knit pattern in worsted weight yarn that have three choices of colorwork for the tops of the mitts.

Lernen is a fingering weight lace shawl.  It’s perfect for beginning lace knitters as it gradually adds new stitches as you work the shawl.

Drachen is a oversized fit drop shoulder sweater that was published in Knitty Magazine.  It features a colorwork dragon motif around the hem.

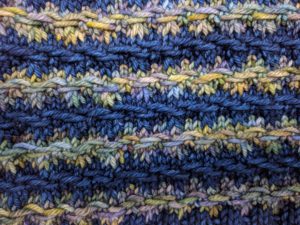
Finally, the Stripes of Many Colors Cowl is the perfect way to use up the mini-skeins from a yarn advent calendar or any collection of mini-skeins or leftover yarn.  You’ll need about 135 yards of a contrast color to use throughout the cowl, but I think you will love the results!


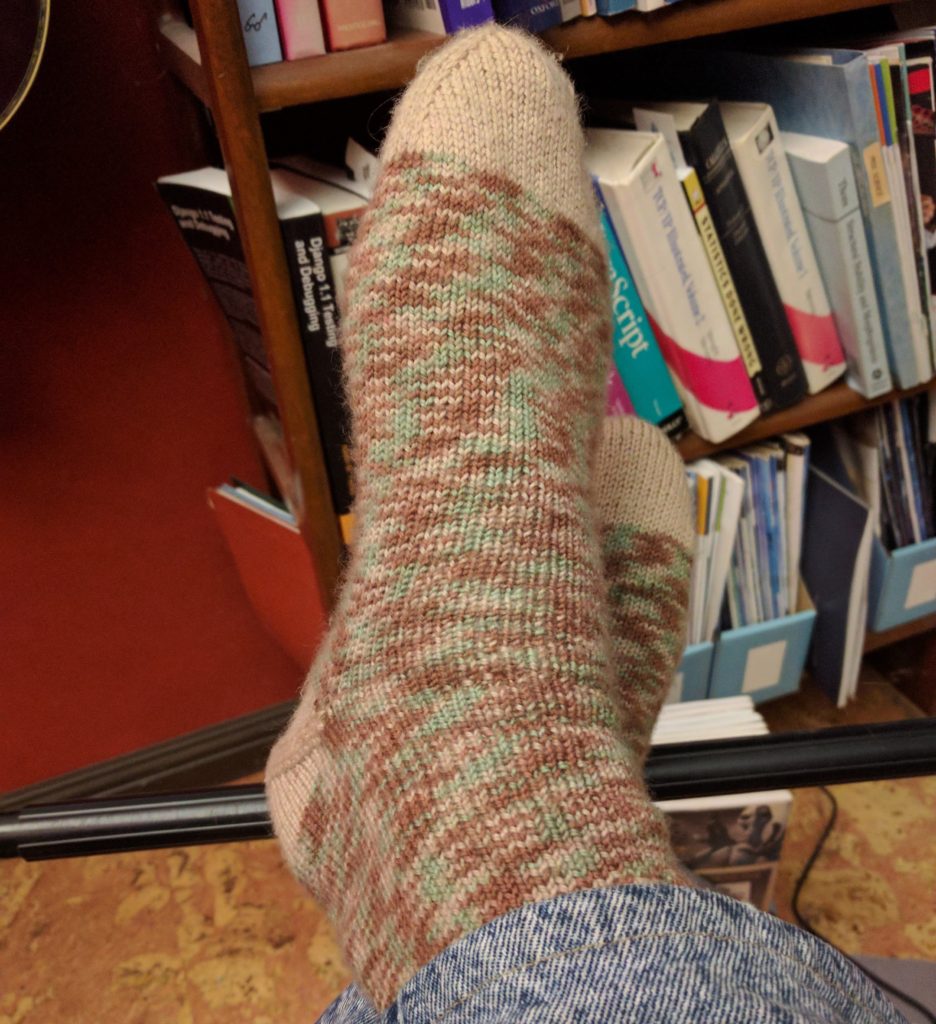
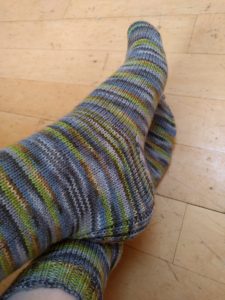
In addition to the Gift-a-Long projects I completed, I also finished my Spanish Bay Cardigan, a pair of shortie socks that I gave as a gift, and my convertible poncho.  I started the Judah Cardigan just last week.

So although I didn’t find time to write much here, it’s been a busy three months!  You can also follow me on Instagram and on Facebook, where I often find time to make some quick updates!


Teaching Tips: The Beginner’s Mindset

Teaching Tips: The Beginner’s Mindset

Here’s a great way to become a better teacher: sign up for a class to learn something completely new that is outside of your previous experience.

If you are teaching knitting, you probably have been a knitter for a while and may have forgotten what it was like to learn to knit for the first time.  One of the biggest mistakes we can make as teachers is to assume the knowledge we have about our subject is “obvious” and skip over important explanations and steps in our teaching.

So go take a class outside your comfort zone.  Experience being a beginner taking a class from a subject matter expert.  Notice what the instructor makes easier by adding details for the novice and/or notice where the instructor makes assumptions about what you should know that you don’t know.  Where does the instructor go too quickly for the novice?  When does the instructor ask questions to assess student understanding and how do they tailor their instruction due to the responses?

Then the next time you teach a class to beginners or you teach an unusual technique, put yourself in the place of the beginners.  Think about what assumptions you are making about your learners and how you can confirm those assumptions are correct and what you can do if they are not.  What knitting moves need slowed down so the novice can follow them?  What details might you need to mention that the novice might not know?

Every time you teach a class, remember to put yourself in that beginner’s mindset.  Your students will thank you!  If you are using my teaching packs, you’ll find a list of common points of confusion for each lesson and how to handle it!

Teaching Tips: Recommending the Next Project

Teaching Tips: Recommending the Next Project

When you teach a knitting class, students often ask what pattern they should work on next.  Your answer should depend on the student’s goals.

If the student wants to practice the skills they have learned in the class they just finished, then suggest a pattern that has mostly or completely the same skills.  Prior to teaching a class, check the shop samples for patterns with similar skills you can recommend and/or make a short list of patterns from Ravelry that you can suggest.

If the student is working to increase skills with each project, then you should suggest a pattern with one or two new techniques.  That way the student can both practice the previous skills (important for retention) and try something new!  Again, look at shop samples for possibilities and also your shop’s class list for appropriate next step classes.  If you are using my Teacher Packs, the lessons can be taught in the order they are presented for a smooth progression of added skills.  Make sure students know where they can get help if they are working independently.

Of course, there will always be the knitter who after taking one or two classes, jumps in with both needles into a complex knitting pattern.  The best way to support these students is to help them step by step through each section of the pattern.  Don’t discourage them, we all learn differently, but give them the resources they need if they get stuck.  Think of these students as the type who loved taking four week summer courses that covered a semester’s work in college rather than pace it out over 16 weeks of a normal term.  These students will benefit from private lessons or from drop in troubleshooting classes.

On the Needles in June

On the Needles in June

The last month has been a time of putting some projects on hold and ramping up others.  Tomorrow I’m planning to publish the sixth in my series of eight teaching packs.  This one will include a pattern for a baby sock and teach students all the basics of knitting a top down sock so they can go on to full sized socks knowing all the basic techniques.  I’ve been working on the pattern for the seventh teaching pack– an introduction to slip stitch knitting.  Look out for a new pattern for the Seetang Cowl that goes along with this pack– it has a great texture that works will with variegated yarns!

My shawl design is on hold as I wait for another skein of yarn to arrive.

So while I wait, I started on the On a Whim sweater I picked out last month.  I am making a lot of progress and am only about 25 rounds from the underarms!  Since it’s an A-line design, that means I’m probably about half way done with the knitting!

I decided to take the Featherweight Cardigan off the knitting belt and start working it in my usual continental style of knitting.  I really like the idea of a knitting belt, but putting it on and taking it off slows me down from picking this project up.  A lightweight sweater like this one is perfect for Santa Cruz weather and I want to get it done, so I’m keeping it on the same needles but using them as straight needles.  I’m not giving up on the knitting belt, but I need to find another project (perhaps in larger yarn) to work on it.  I’ve reached the underarm seams on the back piece and am starting the bind offs.

I have two pairs of socks on the needles.  The Rose City Rollers are in my purse, waiting for down time for me to start the heel flap on the second sock.  And I’ve passed the heel and am on my way up the leg on my first in a pair of Fidget Socks.

Teaching Tips: Should I correct stitch mount?

Teaching Tips: Should I correct stitch mount?

When I’m teaching knitting classes, one thing that comes up occasionally is stitch mount.

For most English speaking knitters, the stitches on their needles have the right leg to the front and the left leg to the back as shown on the left-hand needle in this drawing (Western method knitters).  However, some knitters mount their stitches with the right leg to the back and the left leg to the front as shown on the right-hand needle in this drawing (Eastern Method knitters).  Or they might work knit stitches one way and purl stitches another way (Combination method knitters).

If one enters the stitch on the right-hand needle by trying to insert the needle to the left side of that front leg, it will twist the stitch.  Many of the knitters I’ve met who mount their stitches this way, know to enter the stitch from the right side of that front leg, so the stitch doesn’t twist.  The only problems come in when these knitters try to follow directions for certain increases and decreases that assume the stitches will be mounted with the right leg to the front.

Here’s my philosophy: there is no wrong way to knit if you get the fabric you want.  I never try to change the way an established knitter forms their stitches in my class if they are getting the fabric they want and working at a satisfying speed.  I do help them convert English directions to make increases and decreases work as the pattern expects them to work.  For a great resource on this, check out this handy chart.

On the other hand, I do encourage brand new knitters who will be using primarily English language patterns to adjust their stitch mount to fit the expected norm for those patterns– the Western method.  I explain my reasoning (simplifying reading patterns as their skills develop), but I also explain that not changing means they just have to be conscious of their desired results and when they need to diverge from the written directions.

For links to purchase my teaching packs for beginning knitting classes click here.  For a great explanation of different knitting styles and methods, check out this tutorial.  And if you aren’t familiar with knitting in a variety of methods, I highly recommend Patty Lyons’ Craftsy class called Improve Your Knitting, which includes basic instruction for a variety of styles and methods.

Teaching Tips: Asking Permission

Teaching Tips: Asking Permission

One thing that I always try to do while teaching a class is to ask permission before I handle a student’s work.  This is a small thing, but my goal in class is to empower students to find and correct their own errors.  If I take their work every time a problem occurs and whisk it away for a quick fix, my students never really learn to do the things they need to do when they are on their own.

When a student asks for help, I look at the work in their hands and see if I can identify the problem and give verbal directions.  If not, I ask if I can hold their work so I can examine it more closely.  Once I’ve identified the problem, I have some choices.  I can ask the student if I can fix it for them and explain what I’m doing, or I can hand it back and direct the student verbally or using my sample to demonstrate.  I do a mix of these things in class, depending on the skill level of the individual student and what the student indicates to me that she or he needs to move forward.  I admit I may not be perfect at asking permission every time, but learners benefit from being treated as capable and in control, and asking permission is one way to achieve this goal.


On the Needles in April

On the Needles in April

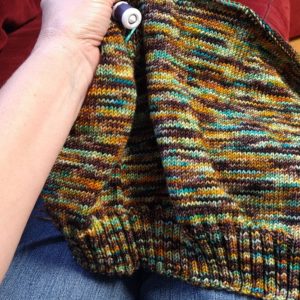
I did a lot of starting and finishing of smaller projects in March.  I made a total of five crochet mandalas, several of which are going to be on display at Knit Sew Make.  I also crocheted the Artfully Simple Angled Scarf with some yarn I purchased from Leading Men Fiber Arts.  And I finally finished my Vanilla is the New Black socks, which I am pretty pleased with!  I’ve also been working on making Knitted Knockers.  I go to a knitting retreat every April and Knitted Knockers is the chosen charity by the organizers.

I have enough yarn left over from my socks to make a pair of shortie socks, so I started the Rose City Rollers socks as a purse project.  I also needed a new pair of socks to go on my bedside table, so I’ve got a pair of Fidget Socks started as well.  This is a toe up pair, and I have to say, I find starting toe up socks more fiddly than fidgity!  I always feel I have to get eight or ten rounds in before it starts to feel comfortable!

I picked up a project that has been languishing, a creature from Edward’s Crochet Imaginarium.  I started this last year for my daughter, but was finding that it was hurting my hands to work at such a tight gauge.  I switched from my beloved, owned-since-high-school Boye hook to a padded ergonomic one from Knit Picks and things are moving right along.

I continue to make progress on my Wynne shawl and will be ready to bind off after just a dozen or so almost 500 stitch rows!  I’m using a gradient for the blue and I really want to reach the next darker color to edge the shawl before I bind off so I’m adding a few extra rows to the end.

I’m also in the planning and swatching stages for a new shawl design.  This pattern will be in fingering weight with a pattern that will gradually move from simple eyelets into more complicated lacework.  I’m envisioning it as a KAL shawl for new lace knitters or a teaching tool for classes.

Speaking of teaching tools, one thing that came off the virtual needles in the last month was a set of teaching packs.  These are sets of materials designed for busy shop owners and knitting teachers.  They have everything you need to teach a class– a reproducible pattern, class handouts, and teacher notes– all you need to do is make the sample and teach!


Teaching Tips: Developing Your Mental Library

Teaching Tips: Developing Your Mental Library

One of the key difference between teaching adults and teaching children is that adults come to class with a rich collection of prior experiences.  So when you teach knitting classes with adult learners, you have the opportunity to help the students draw out that prior experience to learn the new skills you are teaching.

Some of your students’ prior experiences will be with the fiber arts.  They may have crocheted, or embroidered, or sewed, and each of these crafts has related experiences.  For instance, crocheters usually tension the yarn with their left hand, so in beginning knitting classes, I will show crocheters how to knit Continental style rather than English style as it is usually easier for them.  Weaving in ends may make more sense if it can be related to embroidery.

Other times, prior experience is related to other fields that can be applied to knitting.  For instance, students who have experience writing computer code may find it helpful for me to show how reading a pattern is similar to reading code.

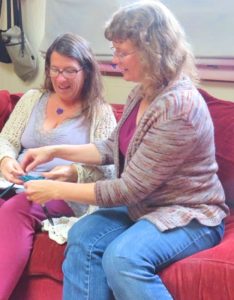
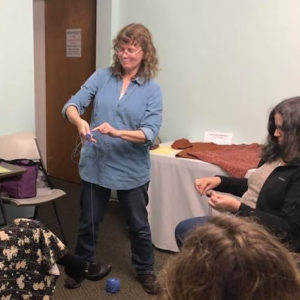
I also find that some students find more benefit to visual cues in diagrams, others find it easier to repeat a rhyme or catchphrase, and still others will learn best from mirroring my hands in motion.  These preferences are often based on prior experience or work related skills.  Because of this, I try to have at least three different ways to explain any skill in that I teach in a knitting class.  Some of these I’ve developed by listening to how one student will explain a task to another student.  Others have been gathered from watching other teachers and from reading a variety of books.  A few have been created on the fly when no other explanation seems to work for a student and I’ve had to invent a new way to explain a task.

To help me know what might work best for a given class, I always take some time for introductions and find out what related skills students may already have.  If I have a large class and don’t have time for individual introductions, I use a quick verbal survey and hand raising to get an idea of student experiences and prior knowledge.

Having a mental library of different ways to explain a skill will help all your students to be successful.  Note that your mental library may include tricks and techniques that would not be useful at all to you as a learner, but they may be useful to one of your students.  Becoming a successful teacher is in part developing the ability to teach those who learn in different ways.


Teaching Tips: Clarifying Your Goals

Teaching Tips: Clarifying Your Goals

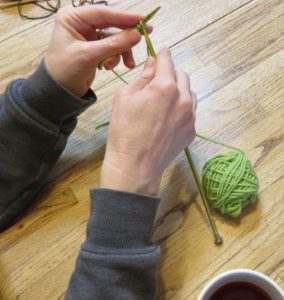
When I begin to develop a new knitting class (or any class, for that matter), I always start with thinking about what exact skills I want students to be able to accomplish when they leave the class.  For instance, when I teach my Knitting 101 class in which students make a simple mug rug, my goals are for students to be able to:

  • Identify basic pattern information.
  • Cast on and bind off.
  • Make knit and purl stitches.
  • Move between knit and purl stitches in a single row.
  • Identify some of the mistakes in their work.

I have a particular way of thinking about how to write those skill statements.  I always start off with a verb that I can mentally assess as I work through the class.  Something that I can actually see happening– identify, make, move between, cast on, etc.  I use verbs that describe what my students can do by the end of the class, not what I’m doing.  And I try to be specific about what I’m expecting, for instance “in a single row” or “some of the mistakes.”

Once I’m clear on what the students need to accomplish, then I plan how I can help them be able to do those things.  For instance, in Knitting 101, my first goal is for students to be able to identify the parts of a pattern before they even start knitting because after they take this class, they are likely to look for a pattern to make that’s more exciting than a mug rug.  So after I’ve explained the basic information found at the front of a pattern, I give each student a different pattern to look at, and ask them to find the materials, gauge, key, etc.

I find that if I put my attention on what the students should be doing during class, that my classes are more active and that they tend to be more focused.  Next time you are planning a class, start with thinking about what specific skills or knowledge you want the students to leave with and use those to plan what demos to use, what stories to tell, and what exercises students should complete.

Fitting Socks

Fitting Socks

Fitting socks is a bit easier than fitting sweaters, you mainly have to worry about the length of your foot and the circumference of you foot and/or ankle.  Most of my sock books recommend about 10% negative ease for the sock circumference and 1/2″ of negative ease for sock length.

Here’s how I found the ideal sock dimensions for my foot.  First I measured around the widest part of my foot just below my toes.  On me, this measurement is just shy of 9″.  On my calculator I put in my foot measurement times .9 and pressed the equals key.  (9 x .9 = 8.1)  My idea sock circumference would be around 8″.  Why multiply by .9 you might ask?  To make a tube 10% smaller than my actual foot circumference, I need 9/10 of the total size.  Multiplying by .9 gives me an answer that is 9/10 the original number.  Since my foot is really just shy of 9″, I rounded my answer down.

Length is a bit easier.  I measured my foot length while standing and subtract 1/2″.  My foot length is 9 1/2″.  9 1/2″ – 1/2″ = 9″  So I need a 9″ foot length on my socks.

All this works great as long as you are getting the gauge listed in the pattern.  I always swatch in the round when making a gauge swatch for socks.  I usually cast on the number of stitches in 4″ in a tube and knit in the round for an inch or two.  I then measure across the tube.  If it is 2″ across, I’m getting gauge.  If not, I do a purl row and switch needles and try for another inch or two.  If the tube is too large, I try smaller needles, if the tube is too small, I try larger needles.

For my last pair of socks, I simply could not get the row gauge listed in the pattern.  It called for 34 stitches over 4″ (or 8.5 stitches an inch) and even on my smallest needles, I could only get 32 stitches over 4″ (or 8 stitches an inch).  So I multiplied my gauge per inch by my ideal sock circumference (8 stitches x 8″ = 64) and I picked the sock size in the pattern that used 64 stitches– in my case, my pattern had a size that used that exact amount, but you may need to pick a size with a few less stitches than your ideal.  I then went through the pattern circled the numbers for the 64 stitch size for anything that was about sock circumference and I circled the numbers for my “real” size (as if I were getting gauge) for any directions having to do with length.   That way I was able to make a sock that fit!

(Most sock patterns use measurements, not row counts, for directions having to do with length.  If my pattern had included row counts, I would have needed to check my row gauge and adjust those as well, but in sock patterns this is not at all common.)

Of course, if you just enjoy making socks, every pair you make will probably fit somebody!  Here’s a pair that I though I was making for myself but they turned out the perfect size for my husband!