Browsed by
Month: May 2018

Friendship Knitting

Friendship Knitting

This month, my friend Jahna and I got to meet up in San Francisco.  We were wearing the sweaters we made as a friendship knit along.  This was the third project that we’ve done together as a knit along.

The first was the BFF Cowl, which is a completely great friendship project.  You each make two short scarves in different yarn and then you exchange one of them so that you have one that you knit in one color and one your friend knit in another color.  Then you graft the ends together so that they form two interconnected rings.

The second project was a Cheveron Blanket.  Being as they are big and bulky, we’ve never gotten our blankets together.

The sweaters are our most recent project.  For this one, we both picked a sweater from CustomFit, and we picked out yarn from the same indie dyer, but Jahna did hers in a worsted weight yarn and with a longer length and I knit mine in sport weight and a shorter length.  Jahna did some cool color blending on hers as well.

We haven’t decided on our next project, but we are considering a double knit Star Wars scarf!

Looking for some ideas for friendship knitting projects?  One book that we have looked at is Knit the Sky by Lea Redmond.  This book is choke full of interesting possible projects, with a few that are specific to friendship knitting.
 

Teaching Tips: Should I correct stitch mount?

Teaching Tips: Should I correct stitch mount?

When I’m teaching knitting classes, one thing that comes up occasionally is stitch mount.

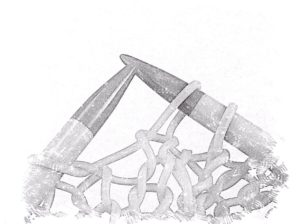
For most English speaking knitters, the stitches on their needles have the right leg to the front and the left leg to the back as shown on the left-hand needle in this drawing (Western method knitters).  However, some knitters mount their stitches with the right leg to the back and the left leg to the front as shown on the right-hand needle in this drawing (Eastern Method knitters).  Or they might work knit stitches one way and purl stitches another way (Combination method knitters).

If one enters the stitch on the right-hand needle by trying to insert the needle to the left side of that front leg, it will twist the stitch.  Many of the knitters I’ve met who mount their stitches this way, know to enter the stitch from the right side of that front leg, so the stitch doesn’t twist.  The only problems come in when these knitters try to follow directions for certain increases and decreases that assume the stitches will be mounted with the right leg to the front.

Here’s my philosophy: there is no wrong way to knit if you get the fabric you want.  I never try to change the way an established knitter forms their stitches in my class if they are getting the fabric they want and working at a satisfying speed.  I do help them convert English directions to make increases and decreases work as the pattern expects them to work.  For a great resource on this, check out this handy chart.

On the other hand, I do encourage brand new knitters who will be using primarily English language patterns to adjust their stitch mount to fit the expected norm for those patterns– the Western method.  I explain my reasoning (simplifying reading patterns as their skills develop), but I also explain that not changing means they just have to be conscious of their desired results and when they need to diverge from the written directions.

For links to purchase my teaching packs for beginning knitting classes click here.  For a great explanation of different knitting styles and methods, check out this tutorial.  And if you aren’t familiar with knitting in a variety of methods, I highly recommend Patty Lyons’ Craftsy class called Improve Your Knitting, which includes basic instruction for a variety of styles and methods.

Crochet Water Balloons for Summer

Crochet Water Balloons for Summer

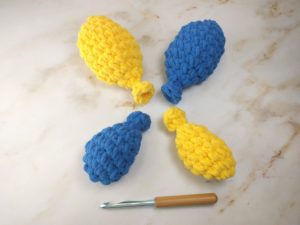
A few weeks ago a friend sent me a link to an article about crocheted water balloons.  The idea was to make a balloon shape out of Bernet Blanket yarn and then soak them in a bucket to throw instead of a traditional water balloon.  The yarn is very absorbent so they soak up a lot of water and make a pretty satisfying splat!

Advantages: reusable, machine washable, don’t leave bits of plastic all over your yarn for birds and wild animals to get, easy to “fill,” fast to make.

Disadvantages: don’t make quite the same explosive splash as a traditional water balloon and they are made of synthetic yarn so you haven’t gotten totally away from the plastic problem.

All the patterns I found online worked in rounds with a chain up instead of working in a spiral, and of course I felt many weren’t quite round enough or had enough of a balloon looking top.  Many patterns called for a magic loop start, which I think is hard in this yarn because it is so grippy.  So in the end, I designed my own pattern!
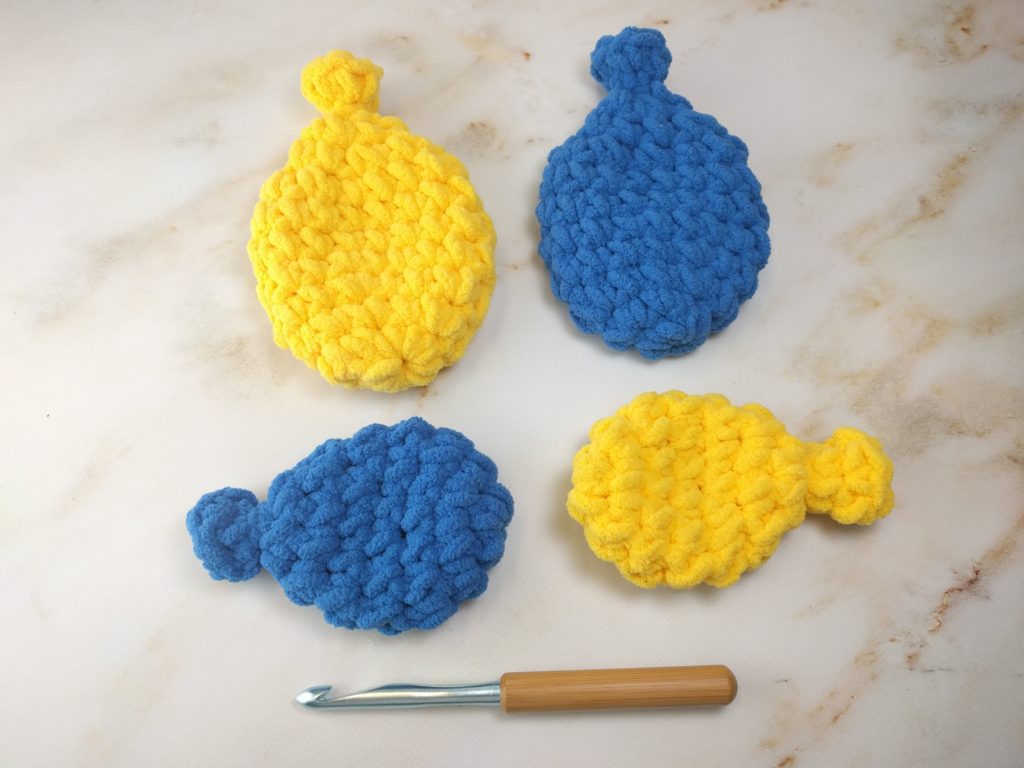
If you are local to Santa Cruz, CA, I’ll be teaching a class on how to make these at Knit Sew Make.    If not, or if you are already comfortable with crochet, here’s the pattern so you can make your own!

Materials Needed:

  • Size 9mm crochet hook (US size M)
  • Bernet Blanket Yarn (or other super bulky chenille style yarn)
  • Removable Stitch Marker

Note: Balloons are worked in a continuous spiral.  To keep track of where the rounds begin, place a removable stitch marker in the first stitch of the round and move it up after each round is completed.

Small Balloon

Round 1: Ch 2, 6 sc in second ch from the hook, do not join. (6 sts)

Round 2:  2 sc in each st around (12 sts)

Rounds 3-4: Sc 12.

Round 5: [Sc 4, sc 2 tog) twice. (10 sts)

Round 6: [Sc 3, sc 2 tog] twice. (8 sts)

Round 7: Sc 2 tog four times. (4 sts)

Round 8: Sc 4.

Round 9: [Sc 1, 2 sc in next st] twice, join to beginning of round with slip stitch. (6 sc).

Fasten off.  Use a piece of yarn to tie the neck of the balloon and push all ends to the inside of the balloon.


Large Balloon

Round 1: Ch 2, 8 sc in second ch from the hook, do not join. (8 sts)

Round 2: [Sc 1, 2 sc in next sc] four times. (12 sts)

Round 3: [Sc 2, 2 sc in the next sc] four times. (16 sts)

Round 4-7: Sc 16.

Round 8: Sc 2 tog eight times.  (8 sts)

Round 9: Sc 8.

Round 10: Sc 2 tog four times.  (4 sts)

Round 11: Sc 4.

Round 12: 2 sc in each stitch around, join to beginning of round with slip stitch. (8 sts)

Fasten off.  Use a piece of yarn to tie the neck of the balloon and push all ends to the inside of the balloon.

On the Needles in May

On the Needles in May

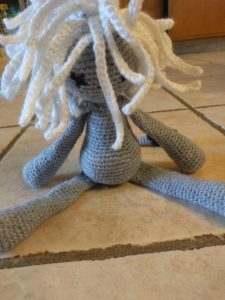
April was a month of finishing!  I completed my Wynne Shawl and the creature from Edward’s Imaginarium for my daughter.  The hair on the creature took as long as doing the arms and legs combined!  I also made two pairs of socks on my circular sock machine for a school raffle.
I continue to slowly move along on my Featherweight Cardigan.  I find that I don’t pick this up as often as I should because I’m working it on the knitting belt and the extra step of putting on the knitting belt somehow keeps it from being easy to pick up.  I’ve considered putting it on regular needles, but I’m afraid my gauge will change and also that I’ll never get good at the knitting belt technique if I bail now!  I probably need to pick a time of day to work on it and stick to a schedule.

Yarn for On a Whim sweater

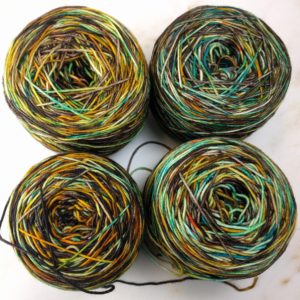
I’ve also got a new sweater swatched and ready to go.  I’ll be making the On a Whim Custom Fit sweater by Amy Herzog in a fingering weight yarn I got from Expression Fiber Arts.  As you can see from the wound yarn, I’ll need to alternate skeins throughout!

I’m making steady progress on my new shawl design.  This will be more of a shawlette, but since it’s also meant to be a pattern to learn to knit lace, I think that’s going to be fine!  I’m really loving the yarn I’m working with and can’t wait to see the final results!

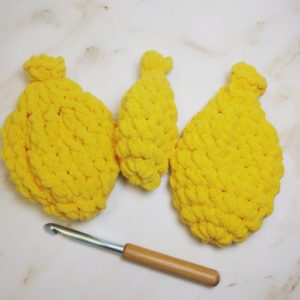
A friend pointed me to the idea of crocheted water balloons, so I’ve also been playing with some super bulky yarn and spinning up my own pattern for these great toys.  They don’t fill with water, but the Bernet Blanket yarn becomes really saturated so they make a very satisfying splat when they hit something (or someone).  And no scraps of balloon to hurt the animals.  And endlessly reusable!  Look for my version of the pattern in an upcoming blog post!

Prototypes for my crocheted water balloon pattern.