Browsed by
Category: tools

Counting Your Stitches

Counting Your Stitches

There are a lot of tools out there for counting your stitches on a gauge swatch.  Here are three that I like and use regularly.

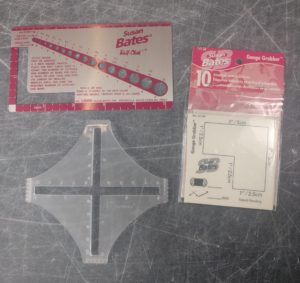
My good ol’ Susan Bates ruler:  Gauge rulers like this come in many variations, but the all involve an L-shaped hole in some kind of rigid material.  Lay it over your swatch, line up the L to a horizontal and vertical line of stitches and count away. Double the number you get to find your gauge over 4″ (10 cm).

The Gauge Grabber: These are designed to be one time use and may even be intended to keep on your swatch permanently, but I tend to use them several times until the sticky stops sticking.  What I like about these is that it’s a bit easier to count partial stitches than the opaque tools like my Susan Bates ruler above, because you can see the partial stitch on either side of the dividing line, making it easier to tell if that partial stitch is a 1/2 stitch or closer to a 1/4 stitch.  I also like that once they are stuck to the swatch, the stitches underneath don’t shift or move about, so they help keep me honest and make it harder to just give that little tug to make the gauge work out.

The Akerworks Swatch Gauge:  To use this ruler, you need to have a good sized swatch– ideally about 6″ (15 cm) square, really.  Gripping feet on four sides of the ruler keep your swatch from moving while you count.  And the semi-translucent plastic helps you judge the actual size of those partial stitches.  It has the widest counting space of the tools I’ve talked about, and the more inches you count, the more accurate your numbers will be.  4″ (10 cm) is the standard used in most patterns, so you can make a direct comparison to what’s written in your pattern.

No matter what ruler I use, I often count my stitches in several places on the swatch, just to see if there is any variation (and if there is, I go with the average).  On smaller projects, or ones where I’m familiar with the yarn, or ones where gauge won’t make a difference in wearability, I might just cast on and check gauge as I go because it’s not much work to frog a small project and a shawl that’s an inch or two larger or smaller won’t bother me.  If I’m making something where fit counts, it’s a new yarn, and/or it has more than a skein of yarn involved, I make a good sized gauge swatch worked flat or in the round as the pattern will be worked and I play with needle sizes till I get what I want.

Podcast Favorites

Podcast Favorites

I love listening to podcasts while I knit, and when the news gets too overwhelming, I listen to them while I drive as well.  I have quite a few I like to keep up with.  Here are some of my favorites!

This first batch of podcasts have a similar format.  They are chatty podcasts with one or two hosts who talk about what they are working on mixed with some advice and/or inspiration and some talk about their non-knitting lives.  All of these have active Ravelry groups so there is a lovely community you can join with each one.

  • The Knitmore Girls is my favorite in this category.  I love how Jasmine and Gigi, a mother-daughter team, mix in lots of advice and wisdom into their podcast.  They do a regular review section, which has enabled me more than once to get some really great books!
  • The Yarniacs were my first podcast because they came to speak at our knitting guild!  I had no idea there were even knitting podcasts before I met them.
  • Prairie Girls Knit and Spin is another favorite.  I always feel the hosts are the alter egos of me and my best friend if we were from Nebraska instead of Kansas!
  • Down Cellar Studio Podcast is a new favorite of mine– Jen lives a very different life than me, but I really enjoy her creative spirit!
  • The Two Knit Lit Chicks host a podcast that is both knitting and book reviews.  Another mother-daughter team that I really enjoy listening to!

This second batch are podcasts with more specific themes and an interview format.  These are podcasts that are more informational and keep me inspired in pursuing knitwear design.

  • Yarn Stories is a new favorite for me.  I’ve been absolutely loving hearing interviews with the many indie dyers and yarn producers and learning more about the yarns I use.
  • Tightly Spun is a new podcast that interviews everyday knitters.  It reminds me how we all have a story to tell about knitting and how it has changed our lives.  (You can find the interview that I did here.)
  • Stitchcraft Marketing focuses on interviews with people in creative industries.  It’s a great resource for anyone trying to make money in the crafting market.
  • The Sweet Georgia Show also has an interview format and goes in seasons.  She has hosted some very interesting guests.

Those are the podcasts I keep cued up right now!  What are your current favorites?


Addi FlexiFlips Review

Addi FlexiFlips Review

Two of three needles in before beginning a round.

In November at Vogue Knitting Live in Seattle, I came across a new DPN style by Addi called FlexiFlips.  These are similar to the Neko Strickespiel curved DPNs that I reviewed early last year in that there are only three needles in a set.  The difference is that instead of being in a fixed angled shape, the FlexiFlips have a short cord between two metal needles.  This means they can go from straight to a tight angle and back as needed.  They are pretty spendy– around $24 from most retailers for a single set of three needles– so I purchased a single set of size 1 needles for hand knitting socks.

I’m about half way through making my second sock with the needles and I can say that I will definitely use them again for another pair.  Their flexibility gives them a distinct advantage over the Neko needles.  I am having little to no problems with laddering and the flexible shape of the needles makes them easier to adjust as you work.  Like the Magic Loop method, these needles only require two changes in a round, rather than the three or four you’d have with regular DPNs.  Unlike Magic Loop, you won’t need to manage a long cable and these are very easy to tuck into a purse or pocket.  You may have to adjust the directions to you pattern a bit if it’s not needle agnostic, but if you are used to doing this for Magic Loop already, it shouldn’t be a problem.  Patterns that are designed for Magic Loop can easily be completed with the FlexiFlips.

Beginning the round with the third needle.

For the fastest speed on the leg and foot of a sock, I like using a very small eight or nine inch circular because there’s no needle changes at all, but the small circulars have very short needle lengths and they can fatigue my hands more quickly than DPNs.  The FlexiFlips have a longer needle length overall so they are easier on my hands and I don’t have to carry an extra set of DPN’s for heel flaps or toes as I do with the small circular.

My one criticism of the FlexiFlips are the needle tips.  They have the design of one blunt needle and one sharper point.  Each time you have worked all the stitches off a needle you have to consciously think about how the empty needle goes back into your right hand so that the preferred tip is ready to use.  I prefer pointier tips in general, and especially can’t think why I would want a blunt tip in a needles sized for sock knitting.  Sadly, when working back and forth for short rows, that means one tip is going to be blunt and the other sharp if you’ve be orienting the needles the same way each time.  Either that, or you have to slip the stitches so that you have the pointy tip going in the right direction for both needles as you do your short rows or think ahead during the last round before the short rows.  Many patterned stitches use both needle tips to manipulate the yarn, and again, I find having to always have the left hand tip be my non-preferred style to be a nuisance.  If I could get a set with sharp tips on both ends of the needles, I’d be a much happier knitter!

Blunt tip, left, and pointy tip, right.

Overall, I’d recommend these needles.  They combine the ease of the Magic Loop method with the compact feel of a small circular or DPNs.  If you do a lot of complex patterning on socks, they might not be the best choice because of the tips, and they won’t work for larger circumferences like that of an adult hat.   They are comfortable to use and work well for socks or close fitting sleeves.

On the Needles in February

On the Needles in February

Friday afternoon, I sat down on the couch and realized that I was surrounded by knitting bags!  Here’s what’s on the needles in this first week of February.

Last month, I started working on the CustomFit version of the Featherweight Cardigan.  I’m using Knit Picks Alpaca Cloud Lace yarn and I’m using this project to learn to knit on a knitting belt!  I’ve got about five inches of the back completed and I’m getting faster.  My goal is to be able to walk and knit using the knitting belt, but so far, I can just meander between the kitchen and the living room.

Last year at Stitches West, I took JC Briar’s class on Beginning Brioche.  The handout included a chart for us to practice our increases and decreases and shortly after the class I got some Malabrigo Rios in Black and Jupiter and started the chart as a scarf.  As Stitches West is coming up again at the end of the month and I have another class with JC (this time it’s Slick Set In Sleeves), I thought I’d try to finish it before the show.

I’m continuing to make progress on my Wynne Shawl by Sarah Jordan.  I started this as part of the Indie Designer GAL on Ravelry, but realized after Christmas I couldn’t finish it by the deadline and that its long rows of garter were so great as a knitting group project.  I bring this with me to my Saturday knitting group and to guild meetings and it will get done eventually.

I’m working on the second sock of a pair from the pattern Vanilla is the New Black by Anneh Fletcher.  It has an unusual heel construction and I’ve been using the p

attern to try out the Addi Flexi Flip needles I got at Vogue Knitting Live in Seattle.  I really like the pattern and it makes a nice heel that’s good for a high arch, but is easier than working a heel flap and gusset.  The needles are similar to working with Magic Loop and a bit easier than three or four DPNs.


Finally, I’m working on a secret knitting design that should be complete in the next few months or so.  More details on that when it comes out!

On the CSM, I’ve completed a few more pairs of socks and made a hat from a double layer of laceweight yarn.  You can find the details of how I did that on my Ravelry project page.


Playing with Curved DPNs

Playing with Curved DPNs

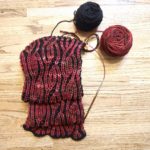
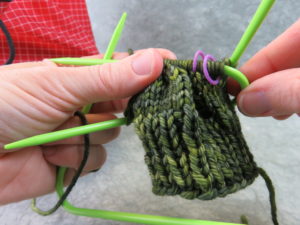
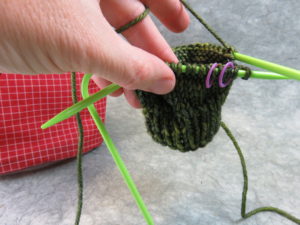
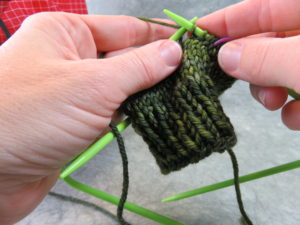
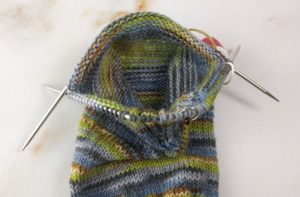
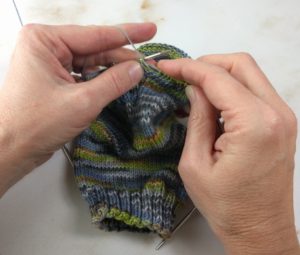
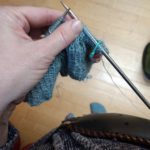
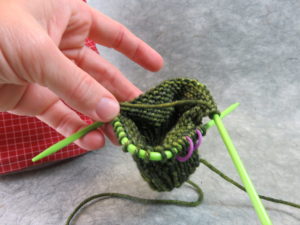
I recently purchased some curved DPNs and for my first project I made a couple of pairs of fingerless mitts from a pattern by Clara Parkes in her Craftsy class, Stashbusting (it appears to be very similar to this pattern on Ravelry).  I purchased the Neko Strickespiel curved DPNs from Candra’s Yarn Paradise on Etsy.

Basically, they are a set of three bent DPNs made from a slightly flexible plastic.  Each of two needles has about half the stitches on it and you curve the waiting stitches around one needle while you push together the ready to work stitches on the other needle so that you have the triangle shape you would get working with three traditional, straight DPNs.

Advantages:  I liked working with them because there are only two needle changes per round, similar to working with a magic loop, but without the extra cables hanging out.  I like using magic loop, but with small objects like mitts or socks I often feel like I have more needles and cables than yarn in action!  I felt like my rounds went faster than when I use a regular DPN set or magic loop.  There were less pointy things sticking out than with straight DPNs, which made working on a small object seem easier.

Disadvantages: The needles have some gaps on the small end of sizes, missing some of the US sizes that are listed in patterns.  I also had trouble with laddering where the two needles met in my work.  I don’t usually have trouble with laddering on straight DPNs.  Because of their shape, the trick of moving the location of your needles as you work was not easy to do.  I found that if I tugged on both the first and second stitch each time I rotated to a new needle, the laddering disappeared for me.

Tricky bits: I watched this video on the Neko page to help me figure out how to hold the needles.  With straight DPNs, I usually rotate the needle I’m working stitches off of to be on top of the other needles with a little under/over flip of orientation as I start each needle.  With the Neko’s, I found that working one needle on top of the other two ends and one needle under the other two ends was the best strategy for fast changes between needles.

Pushing the stitches forward onto the tip of the working needle.
Ready to knit the next round.
Knitting off the next needle.