Browsed by
Category: techniques

Introduction to The CSM Cookbook

Introduction to The CSM Cookbook

You can purchase The CSM Cookbook through Ravelry. The following is the introduction to the book.

This project started out as a way to keep myself organized.  I noticed that as I learned more and more ways to make socks on my CSM that I would get confused or over confident and start skipping steps.  I made myself some checklists so that I wouldn’t forget all the important steps to making a given type of sock but I kept them open ended so that I could use them over and over again.  From those lists came this “cookbook” of recipes that you can use on your sock machine. Think of this as a basic first cookbook – it contains twelve recipes for all of the most common circular sock machine styles with six socks that are “top down” and start with the cuff or hem, and six socks that are “toe up” and start with an extended toe that can be stretched across the cylinder for a seamless design.

There are some things I’m expecting you to know before using these patterns:

  • I’m assuming that you know how to set up your machine, adjust the tension, and get started on some waste yarn.  I refer to hanging a bonnet, but however you start a sock is fine.
  • I’m assuming that your cylinder is marked with half marks to divide the front and the back of the cylinder evenly and that both the front and the back half have target needles marked for making heels and toes.  
  • I’m assuming that you know how to do things like engage your heel spring and crank in both directions for heels and toes.
  • Since rehanging heel forks or v-hooks while making a heel or toe depends on your particular set up, there aren’t directions for when to do this.  Just move your weights when needed.
  • Finally, I’m assuming that you have learned how to clean your machine, time your ribber, and adjust your yarn carriage.

If you need help with any of those things, I’ve included some of the best online instructions and videos in the back of this book in the Resources section.  Once you have those basic skills, these checklists will help you put them together to make beautiful socks.

Once I started working on these patterns, I realized that there were other things a new cranker (that’s a person who uses a hand crank sock machine) might like to have, like directions for making gauge swatches or a worksheet to easily determine the rounds needed for a given person’s foot or illustrations for techniques I mentioned in the patterns.  Suddenly, I had a whole book, not just patterns!

I was introduced to circular sock machines as a hand knitter and knitwear designer, so you will see that I use hand knitting terms within this book.  Many of my hand knitting skills transferred easily to working with the sock machine, so I used those conventions as I wrote. The patterns are written in an open ended format so that you can customize the pattern to make the type of sock you want in that style.  Every pattern can be used to make anything from an ankle sock to a knee sock and from the most petite foot length to an extra long foot, just fill in the blanks to adjust the leg and foot as needed.

As in hand knitting, there are many ways to accomplish a particular result on a sock machine.  I’ve illustrated the methods that work well for me, but please explore other methods and find the ones that are right for you.

One final comment:  Part of the process of learning to use a sock machine is making mistakes.  These checklist style patterns will help keep you from making mistakes in completing all the steps of the process, but you’ll still have plenty of dropped stitches and other mistakes.  The video channels listed in the Resource section show many examples of how to recover from mistakes. When something goes wrong, I usually try to estimate how long it will take me to repair the mistake compared to just scrapping the sock and starting over.  My advice is to take on a learner’s mindset. Go slow at first, try new methods now and then, and enjoy the process of figuring things out!

Anatomy of a Sock

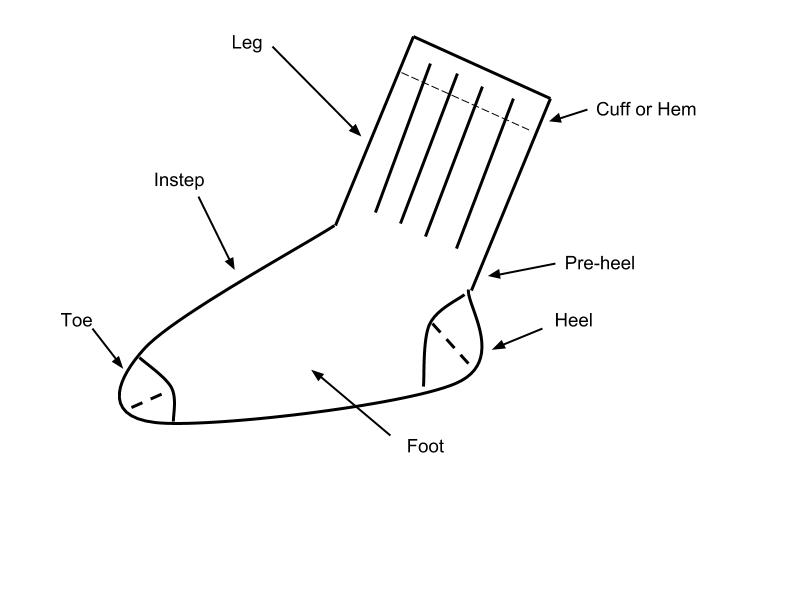
Included in this book you will find six different socks that start at the cuff or top hem and six that start at the toe.  Each recipe takes you through all the steps of making a particular type of sock. Below is a diagram of the basic parts of a sock, whether you work the sock from the top down to the toe or from the toe up to the top.  

There are a few distinctions between parts depending on the type of sock.  The very top of the sock is referred to as the cuff when it is ribbed and as a Hung Hem if the edge is folded over and secured on the inside of the sock.  A pre-heel is a part of the sock that is worked in smooth stockinette for the back of the heel so that the sock fits better and is more comfortable inside a shoe.  If the sock doesn’t have ribbing or mock ribbing on the leg, there will not be a pre-heel.
Purchase the complete 72 page ebook today!

Teaching Tips: Should I correct stitch mount?

Teaching Tips: Should I correct stitch mount?

When I’m teaching knitting classes, one thing that comes up occasionally is stitch mount.

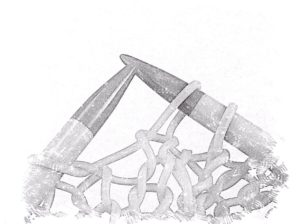
For most English speaking knitters, the stitches on their needles have the right leg to the front and the left leg to the back as shown on the left-hand needle in this drawing (Western method knitters).  However, some knitters mount their stitches with the right leg to the back and the left leg to the front as shown on the right-hand needle in this drawing (Eastern Method knitters).  Or they might work knit stitches one way and purl stitches another way (Combination method knitters).

If one enters the stitch on the right-hand needle by trying to insert the needle to the left side of that front leg, it will twist the stitch.  Many of the knitters I’ve met who mount their stitches this way, know to enter the stitch from the right side of that front leg, so the stitch doesn’t twist.  The only problems come in when these knitters try to follow directions for certain increases and decreases that assume the stitches will be mounted with the right leg to the front.

Here’s my philosophy: there is no wrong way to knit if you get the fabric you want.  I never try to change the way an established knitter forms their stitches in my class if they are getting the fabric they want and working at a satisfying speed.  I do help them convert English directions to make increases and decreases work as the pattern expects them to work.  For a great resource on this, check out this handy chart.

On the other hand, I do encourage brand new knitters who will be using primarily English language patterns to adjust their stitch mount to fit the expected norm for those patterns– the Western method.  I explain my reasoning (simplifying reading patterns as their skills develop), but I also explain that not changing means they just have to be conscious of their desired results and when they need to diverge from the written directions.

For links to purchase my teaching packs for beginning knitting classes click here.  For a great explanation of different knitting styles and methods, check out this tutorial.  And if you aren’t familiar with knitting in a variety of methods, I highly recommend Patty Lyons’ Craftsy class called Improve Your Knitting, which includes basic instruction for a variety of styles and methods.

Fitting Socks

Fitting Socks

Fitting socks is a bit easier than fitting sweaters, you mainly have to worry about the length of your foot and the circumference of you foot and/or ankle.  Most of my sock books recommend about 10% negative ease for the sock circumference and 1/2″ of negative ease for sock length.

Here’s how I found the ideal sock dimensions for my foot.  First I measured around the widest part of my foot just below my toes.  On me, this measurement is just shy of 9″.  On my calculator I put in my foot measurement times .9 and pressed the equals key.  (9 x .9 = 8.1)  My idea sock circumference would be around 8″.  Why multiply by .9 you might ask?  To make a tube 10% smaller than my actual foot circumference, I need 9/10 of the total size.  Multiplying by .9 gives me an answer that is 9/10 the original number.  Since my foot is really just shy of 9″, I rounded my answer down.

Length is a bit easier.  I measured my foot length while standing and subtract 1/2″.  My foot length is 9 1/2″.  9 1/2″ – 1/2″ = 9″  So I need a 9″ foot length on my socks.

All this works great as long as you are getting the gauge listed in the pattern.  I always swatch in the round when making a gauge swatch for socks.  I usually cast on the number of stitches in 4″ in a tube and knit in the round for an inch or two.  I then measure across the tube.  If it is 2″ across, I’m getting gauge.  If not, I do a purl row and switch needles and try for another inch or two.  If the tube is too large, I try smaller needles, if the tube is too small, I try larger needles.

For my last pair of socks, I simply could not get the row gauge listed in the pattern.  It called for 34 stitches over 4″ (or 8.5 stitches an inch) and even on my smallest needles, I could only get 32 stitches over 4″ (or 8 stitches an inch).  So I multiplied my gauge per inch by my ideal sock circumference (8 stitches x 8″ = 64) and I picked the sock size in the pattern that used 64 stitches– in my case, my pattern had a size that used that exact amount, but you may need to pick a size with a few less stitches than your ideal.  I then went through the pattern circled the numbers for the 64 stitch size for anything that was about sock circumference and I circled the numbers for my “real” size (as if I were getting gauge) for any directions having to do with length.   That way I was able to make a sock that fit!

(Most sock patterns use measurements, not row counts, for directions having to do with length.  If my pattern had included row counts, I would have needed to check my row gauge and adjust those as well, but in sock patterns this is not at all common.)

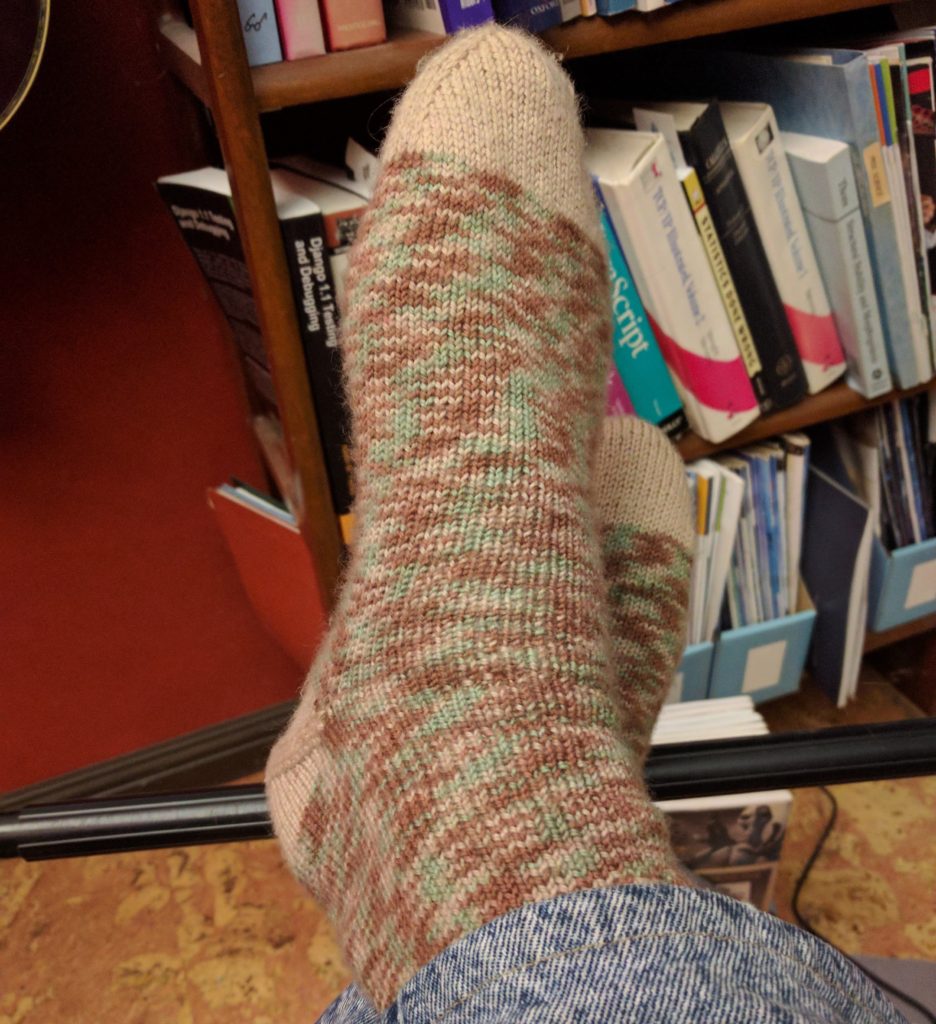
Of course, if you just enjoy making socks, every pair you make will probably fit somebody!  Here’s a pair that I though I was making for myself but they turned out the perfect size for my husband!


Making Mitts on the CSM

Making Mitts on the CSM

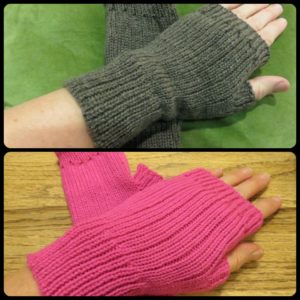
So far I’ve made two sets of mitts on my circular sock machine and they are quickly becoming my favorite project. There are no heels to turn and they are smaller than a sock so there is less cranking.  I make a hole for the thumb using this technique and do a bit of hand work to finish them with a hand knit thumb which is a comfortable thing for me to do as a hand knitter.  They have also taught me a lot about using my ribber.
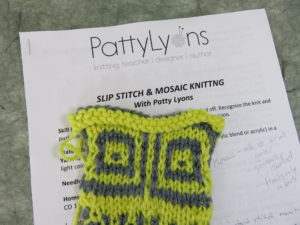
You can take a look at the checklist I developed to make these mitts.  I’ve been using checklists like this for my projects because they help me remember to do all the steps for both items in a pair, and if I’m pulled away from the machine by family needs, I know where I am when I can return.

Since the mitts are ribbed from top to bottom and require starting with the ribber and then changing to less ribber needles and then back to more ribber needles, I had to really get more comfortable with my ribber.  In no particular order, here are some things that helped me:

  1. Slow down!  Stockinette on all cylinder needles pretty much behaves itself at all speeds as long as your tension is right and the yarn is feeding correctly.  At least on my machine, when the ribber and cylinder needles start working together, I need to slow down so the yarn feeds back and forth between those needles evenly.
  2. Watch the first round or two carefully after switching needle formations.  In addition to going more slowly, I carefully watched each needle close around the yarn after putting in the new needles.  Although I carefully check the latches to make sure they are open, by watching each needle, I can make sure each one is going to do its job and I didn’t accidentally brush a latch closed somewhere.
  3. Learn to do the needle transfers from cylinder to ribber as shown here.  At first I was using a pick tool to move the stitches and it stretches them out just enough that they were more prone to dropping.  This method leaves the stitch tight on the new needle.
  4. Watch the latches carefully when switching to and from waste yarn.  The other place I would drop stitches was when moving between waste yarn and project yarn because the knot would get in the way of a needle latch or the long tail pulled into the cylinder would change the angle of the yarn.  So I’ve learned to watch those areas carefully and help the yarn into a latch if it misses.

(Some of the links in this post are to Ravelry forums.  If you are working with a circular sock machine, there are several friendly and helpful groups on Ravelry– and joining Ravelry is free!)

Favorite Sock Knitting Books

Favorite Sock Knitting Books

Last weekend I taught a class on learning to knit socks. One of the things I love about socks is how they are so easy to customize and that even a plain sock can be interesting to knit. I gave my students a list of favorite sock knitting books, so I thought I would share them here as will with some additional annotations.

(Note: all links are affiliate links and if you purchase the book through that link, I’ll get a few cents at no extra cost to you!)

Knitting Rules! by Stephanie Pearl-McPhee

This is not strictly a sock book but rather a book of  humor and recipes for knitting a variety of items including a great chapter on knitting basic top down socks.  What I love about it is the conversational style that Stephanie uses to describe the process of making a sock and how she shows that you can’t really do it too wrong.  I’ve tried to model my class a bit after her style– that socks are something that can make sense and everyone can do it!

Custom Socks: Knit to Fit Your Feet by Kate Atherley

This book is sort of the opposite in some ways to the previous book.  It’s a very detailed and precise explanation of exactly how to make a perfect fitting sock with tables and charts for knitting both top down and bottom up socks with measurements and stitch counts ready for you to plug into a master pattern based on your gauge. It includes some variations on heels, toes, and leg styles and has extensive information about how to make a sock for all kinds of special fitting situations.  Kate has a very scientific approach to sock making.

The Sock Knitter’s Workshop by Ewa Jostes and Stephanie van der Linden

This book is a compendium of a wide variety of heels and toes and construction methods.  It contains a collection of charts with numbers for different sock sizes from children to adults in a standard sock gauge.  You can mix and match your favorite heels and toes with the standardized numbers included.  It also information to help you decide which methods to use based on the shape of your foot.

Sock Architecture by Lara Neel

Similar to The Sock Knitter’s Workshop, Lara’s book describes a wide variety of toe and heel variations, including some that are not part of the book above.  Lara’s book does not give as much information about sizing and construction, but is a great resource for exploring new methods.

Slip stitch knitting

Slip stitch knitting

I’ve been enjoying experimenting with slip stitch knitting, which I find a very approachable and relaxing way to do colorwork.

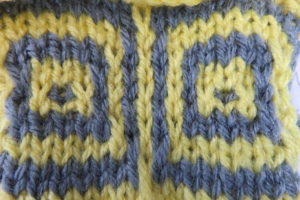
I first read about slip stitch knitting in A Treasury of Knitting Patterns and A Second Treasury of Knitting Patterns.  Many of the patterns are mosaic knitting which forms a pattern of knit stitches on the outside of the garment and all the slipped stitches are on the back of the work.  My first real exposure to actually trying slip stitch colorwork was in a workshop by Patty Lyons at the 2015 Knit and Crochet show.

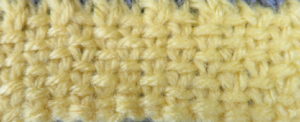
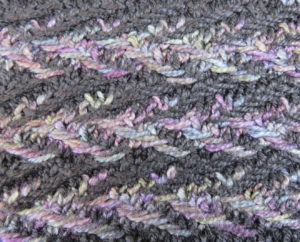
Many slipped stitched patterns, like the common linen stitch, use a single slipped stitch with the yarn in front to make a textured fabric.  This fabric is fairly inelastic and dense.  Although this sample is in a solid yarn, linen stitch does some amazing things to break up variegated yarn.

Mosaic knitting and some other slipped stitch patterns use slipped stitches to somewhat emulate the look of fair isle knitting, where all the yarn floats across the slipped stitches are on the back of the work, so all you see is the knits.

My favorite slipped stitch patterns are those that use the yarn floats on the front of the work as a design element.  I love the way those yarn floats are raised slightly from the rest of the knitting and how you can stagger them to create an effect, like in this swatch from my free pattern, the Aurora Cowl.

My current favorite resource for slipped stitch knitting is The Art of Slip Stitch Knitting.  This book explores several different styles of slip stitch knitting and has projects to go with each one.  It’s part designer’s guide to using the stitches, part stitch dictionary, and part pattern book.

(Note: Links to Amazon are affiliate links, I’ll get a few cents if you purchase through those links.)