A List of CSM Resources

A List of CSM Resources

Recommended Video Channels

SockTV: You can find the live stream of SockTV episodes on select Friday mornings at https://www.socktv.tv/live-broadcast.  SockTV weeks are usually announced on the Erlbacher Gearhart Facebook and Ravelry pages and on the Circular Sock Machine 2.0 Facebook page (linked below).  Over 130 archived episodes are available for $10/month from https://www.sockmachine.net/

Knitpickin YouTube Channel: https://www.youtube.com/channel/UCAZrEMsMB2xQc-XpopwxR1w/videos  Various techniques illustrated.

Grayson Erlbacher and Jamie Mayfield YouTube Channels: https://www.youtube.com/user/erlbachergearhart/videos and https://www.youtube.com/user/jmemayfield/videos Large collection of videos from the makers of the Erlbacher Gearhart.  Some videos apply specifically to the Erlbacher Gearhart machine but most techniques are applicable to any machine.

TheColoradoCranker YouTube Channel: https://www.youtube.com/user/TheColoradoCranker/videos A variety of techniques including a series on making a “Sweet Sock.”

TheWizardofBC YouTube Channel: https://www.youtube.com/user/TheWizardofBC/videos A variety of techniques illustrated.

Kathy Bergeron YouTube Channel: https://www.youtube.com/channel/UCzd4MXI3vwk9MIWXWT37TYA/videos Various techniques.

Rosalyn Keys YouTube Channel: https://www.youtube.com/channel/UCyDKdTmbj9khKhO_yYEvnOg/videos A variety of techniques with a focus on special patterning.

Rosie’s Art Studio YouTube Channel: https://www.youtube.com/user/DreambuildersQuilt1/videos Eight of the oldest videos on this channel are about making socks on a CSM.  Shows how to make two types of sock from start to finish.

Crafts from the Third Floor YouTube Channel: https://www.youtube.com/channel/UCbBMRJ9uOozGvROIaSL2ydQ Check out the “Gertie and Me” series on this channel for videos aimed at beginners.

Supportive Online Social Groups

Ravelry has quite a few forums for circular sock machine knitters.  Ravelry is a social media platform especially for knitters, crocheters, and weavers and requires a membership to join but it is free and is probably the most respectful of privacy of any online forum.  Check out the following groups on Ravelry.

Erlbacher Gearhart Knitting Machine Company: https://www.ravelry.com/groups/erlbacher-gearhart-knitting-machine-co

Circular Sock Machine: https://www.ravelry.com/groups/circular-sock-machine

Circular Sock Knitting Machine Society: https://www.ravelry.com/groups/circular-sock-knitting-machine-society-cskms

Completely Circular and Arbitrary Sock Knitting Machines: https://www.ravelry.com/groups/completely-circular-and-arbitrary-sock-knitting-machines

Sock Knitting Machines and Friends: https://www.ravelry.com/groups/sock-knitting-machines-and-friends

Facebook also has several active sock knitting machine groups, including:

Circular Sock Machine Knitters 2.0: https://www.facebook.com/groups/561948523913745/

Erlbacher Gearhart Knitting Machine Company: https://www.facebook.com/Erlbacher-Gearhart-Knitting-Machine-Company-125605310823212/

Other Useful Websites and Organizations

The Circular Sock Knitting Machine Society has an extensive list of free resources and also has a membership program and newsletter with even more information: https://cskms.org/ 

The Machine Knitter’s Treasure Chest has a variety of resources for CSM owners: http://www.needlesofsteel.org.uk/csm.html 

Sock Machine Knitting Newsletter including DVDs of newsletter archives: http://spear-point.org/news/index.html 

Manuals for Machines

Manuals will have information on how to set up your machine, adjust tension, engage the heel spring, clean you machine, etc.  New machines will come with a manual but you can also find manuals for antique machines here: https://cskms.org/resources/csm-manuals/

Another source for manuals is here: http://machineknittingetc.com/csm.html

Timing Your Ribber

Steve Ashton (aka TheWizardofBC) has a detailed tutorial on adjusting first the cylinder settings and then the ribber settings of your machine.  You can find these tutorials on Ravelry here:

https://www.ravelry.com/projects/TheWizardofBC/basic-factory-settings—part-1—the-cylinder-assembly

https://www.ravelry.com/projects/TheWizardofBC/basic-factory-settings—part-2–the-ribber-assembly

And the same information in a PDF format on the Circular Sock Machine Knitters 2.0 Facebook group as “Basic Factory Settings” parts 1 and 2 here:

https://www.facebook.com/groups/561948523913745/files/

Marking Your Cylinder

Here is one example of how to mark a cylinder:  http://www.thecoloradocranker.com/2009/04/blogger-chart-of-great-value.html

See the manual for your machine for other options.  

Fixing Mistakes

A video on fixing dropped stitches: https://youtu.be/wrevswuo4BE 

Unknitting on a CSM: http://measuredthreads.com/the-unknit/ 

Making a Soft Weight

http://www.thecoloradocranker.com/2013/08/0-0-1-771-4401-colorado-cranker-36-10.html

Purchasing Tools and Parts

https://csmsupplies.com/

https://autoknitter.com/sock-machines-sock-machine-accessories/
http://stores.erlbachergearhart.com/

https://angoravalley.com/sockmachines/accessories.html

New Circular Sock Machine Cookbook

New Circular Sock Machine Cookbook

My last blog post was over a year ago, near the beginning of the pandemic. Since then, a lot has happened. I had a stroke in April of 2020, I worked hard to recover, and then I went back to teaching full time. All the while, I’ve had patterns floating around that I wanted to make into a new CSM Cookbook. Finally, that time has arrived.

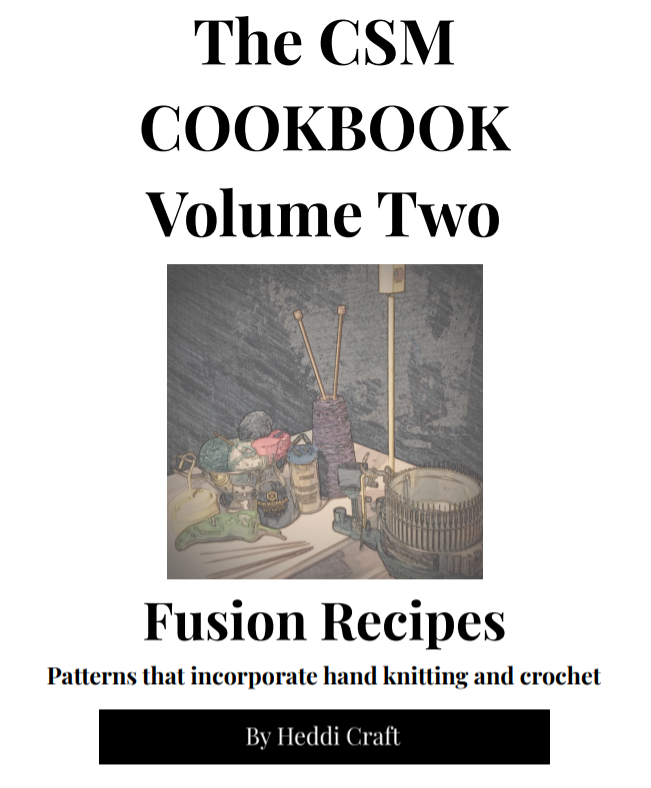
You can find The CSM Cookbook Volume Two: Fusion Recipes on Ravelry as an ebook or as individual patterns. Below is the introduction to Volume Two.

Introduction to The CSM Cookbook Volume Two: Fusion Recipes

Recipe checklists started out as a way to keep myself organized.  I noticed that as I learned of all the wonderful things I could make on my CSM that I would get confused or over confident and start skipping steps.  I made myself some checklists so that I wouldn’t forget all the important steps to making a given item but I kept them open ended so that I could use them over and over again.  From those lists came my first “cookbook” of recipes, The CSM Cookbook.  However, I still had a lot of checklists left over that didn’t quite fit in a basic sock book and many of them used hand knitting or crochet for finishing.  This book contains six of those patterns and includes two types of socks, mitts as well as mittens, headbands with four finishes, and a scarf with a crocheted trim.  All include hand knitting or crochet after the work on the sock machine is finished so I’ve termed them “fusion recipes” that combine more than one craft just as “fusion cooking” combines more than one cuisine!

There are some things I’m expecting you to know before using these patterns:

  • I’m assuming that you know how to set up your machine, adjust the tension, and get started on some waste yarn.  I refer to hanging a bonnet, but however you start a sock is fine.
  • I’m assuming that your cylinder is marked with half marks to divide the front and the back of the cylinder evenly and that both the front and the back half have target needles marked for making heels and toes.  
  • I’m assuming that you know how to do things like engage your heel spring and crank in both directions for heels and toes.
  • Since rehanging heel forks or v-hooks while making a heel or toe depends on your particular set up, there aren’t directions for when to do this.  Just move your weights when needed.
  • Finally, I’m assuming that you have learned how to clean your machine, time your ribber, and adjust your yarn carriage.

If you need help with any of those things, I’ve included some of the best online instructions and videos in the Resources section of my first book, The CSM Cookbook.  The first volume of the CSM Cookbook also contains directions for making gauge swatches, a worksheet to easily determine the rounds needed for a given person’s foot, and illustrations for techniques I mention in the patterns.  Once you have those basic skills, these checklists will help you put them together to make beautiful socks and accessories.  

I was introduced to circular sock machines as a hand knitter and knitwear designer, so you will see that I use hand knitting and US crochet terms within this book. The patterns are written in an open ended format so that you can customize the patterns to your liking.

There are many ways to accomplish a particular result on a sock machine.  I’ve outlined the methods that work well for me, but please explore other methods and find the ones that are right for you.  Part of the process of learning to use a sock machine is making mistakes.  These checklist style patterns will help keep you from making mistakes in completing all the steps of the process, but you’ll still have plenty of dropped stitches and other errors.  My advice is to take on a learner’s mindset.  Go slow at first, try new methods now and then, and enjoy the process of figuring things out!

Included in this book you will find six different recipes for socks and accessories.  Each recipe takes you through all the steps of making that particular item.  One recipe, the Afterthought Sock, contains reproducible directions that can be included with machine knitted tubes you sell or gift to friends.  This is the only pattern that you have permission to reproduce for others.  The rest you may reproduce for your personal use only.

Experimenting with Cloth Mask Patterns

Experimenting with Cloth Mask Patterns

Note: I’m continuing to add to this post as I make more masks and learn more about how to make them effectively.

As I write this, my family is starting week 2 of sheltering in place here in northern California due to the outbreak of Covid-19. The internet is awash with patterns for cloth masks and many hospitals and medical centers are making formal requests for masks. I thought I’d share some of the information I’ve learned and tell you about the three masks I’ve tried.

First, many health care facilities have specific requests for what they want, so it’s probably best to check before you start making masks. Some are requesting specific designs, others have lists of specific fabrics they want used, and others will ask you specifically to use/not use elastic.

In addition, find out how your recipient plans to use the cloth masks. Some facilities are planning to use cloth masks only in low risk areas to save medical masks for high risk areas and others are hoping to use the cloth masks over medical masks to extend the use of the medical masks. Each of these situations requires different solutions. If you don’t have any other information, at least try to find out what their usage scenario is going to be. UC Berkeley School of Public Health is compiling a reliable list of locations that have requested masks.

There is varying information about the effectiveness of cloth masks (see here and here and here and here and here and here and here)and I’ve also found one study on the effectiveness of different materials in cloth masks. (Update 4-3-2020: This study from Yale strongly advocates that we all wear cloth masks.) (Update 4-5-2020: The CDC now recommends cloth face coverings for all citizens.) The bottom line is that cloth masks are not as effective as medical grade masks but if they are properly worn, removed, and washed, they are better than no mask at all.

I tried out three different patterns and then tried them on my face and my husband’s face to assess fit. I used different materials as liners and asked for feedback from my husband on comfort. I used cloth ties for all the patterns as some of the information I found said that the heat used for cleaning may degrade elastic quickly. (However, if you are making masks for the elderly or anyone with coordination issues, elastic might be easier to manipulate.) I washed all the fabrics in hot water and dried them on high heat so that they were preshrunk and I ironed everything before cutting.

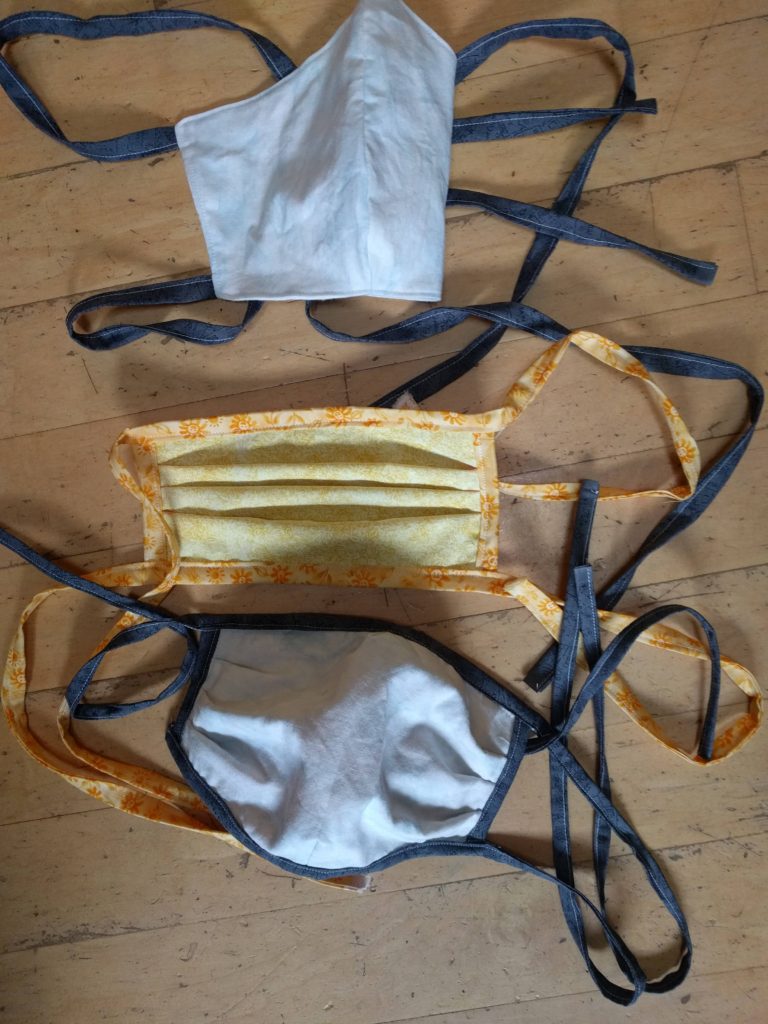
Top to bottom: Fu Face Mask, Facemask, and A. B. Mask

The first pattern was called A. B. Mask – for a Nurse by a Nurse and this was, in my opinion, the best pattern of the three I tried. It had the best fit of the three and worked equally well on my husband and myself. It has both shaping darts and pleats. For this pattern I use a woven cotton fabric for the outside and the ties and a dense t-shirt fabric for the lining. The only change I made to the pattern was that I sewed the top and bottom dart first so that I could enclose them inside the layers before making the pleats. The t-shirt fabric was a little harder to breathe through due to its thickness, but according the the effectiveness information above, as a cotton blend, it would be about 70% effective against a virus. In my opinion, this would be the best mask to use over a medical grade mask (which it was designed for) and has the best fit as a replacement mask. This one took the longest to make but I think the results are superior. (A video tutorial for making this mask is available here.)

The second pattern I used was this Facemask pattern, which is a rectangular style mask with pleats. I added two long strips of fabric across the top and the bottom of the mask for ties instead of using elastic, in the manner described in the A. B. Mask, above. This one was made entirely of quilting cotton. It was fairly well fitting for both myself and my husband although it gapped just a little at the sides and the bottom. This was the second easiest mask to make and it went quickly. With just two layers of woven cotton, it was very breathable. This would be my second choice of patterns and would be best as a replacement for low risk situations as it might not completely cover a medical grade mask.

The third pattern was the Fu Face Mask which I tried because this style was specifically asked for on one of the medical sites I looked at. This is the style that has shaping across a center front seam but no pleats. I picked this particular pattern because it used cloth ties instead of elastic. On this one I used woven cotton for the outer layer and flannel for the inside layer. This design was the least well fitting of the three I tried but the easiest to make. I think if you were making masks only for yourself, this style could be adjusted for a particular face and made to fit well, but if you are making masks to donate, I don’t think it’s the ideal solution. The flannel as a lining was soft and didn’t bother me, but my husband felt it was wicking moisture quickly and found it uncomfortable. This pattern might be good for covering a medical grade mask, but I don’t feel the design is the best unless you can customize it to fit. (ETA 4-05-2020: I’ve tried a couple of other patterns for this style of mask and I think the ones that have a curve at the bottom of the mask provide a better fit. This one from the University of Utah is cut on the bias and I think that also helps to give it a better fit although it wastes more fabric.)

There are numerous sites popping up on Facebook to help those looking to make masks and distribute them. You can find some of them here and here and here and here and I’m sure there are more to come. I’d especially recommend looking for a group local to your area to make sure masks are distributed where they are needed. I hope you find this information useful and feel free to contact me with any questions.

Responses to questions and comments:

What about adding wire to the nose area? Some of the patterns (like this one) use wire or aluminum to make the nose area of the mask more adjustable. I’m concerned about using folded wire/pipe cleaners/twist ties, because I think in an industrial washing situation, the ends of the wire could work their way out of a mask. My husband and I discussed the aluminum solution, and I think curving the ends of an aluminum strip and sanding them would be the most sturdy and safe for washing and aluminum would not rust. We both wear glasses and we noted that they helped close the gap around the nose on all the mask styles.

A good solution I’ve seen is to add a piece of ribbon to the nose area where the wire can go and can be removed for washing.

What about using interfacing for a layer? I’ve read some comments that I couldn’t verify that the interfacing we use for sewing is a “melt blown fabric” like that used in medical grade masks. I couldn’t find any research as to how protective the interfacing actually was, so I chose not to use it without more information. My experience with using interfacing is that it tends to soften and thin after washing, so I’m not sure how that would affect its protective qualities after washing.

The same goes for shop towels. Although many have reported that they have better filtration than quilter’s cotton, they degrade after a few washings.

What about adding pockets for filter inserts? If the nurse or medical facility you are making masks for has access to filter inserts, I think this is a great idea. I didn’t have any to experiment with, so I didn’t try a pattern with a pocket. There are three ways you could add an opening pattern you like to a to insert a filter. One would be to finish the edges of both layers of the side or top of a two layer mask with folded fabric strips before enclosing the other edges. The second would be to add extra fabric to your pattern so you can fold and seam the edge before adding layers. This pattern shows an example of how to do that. The third method would require your lining fabric to be something like a t-shirt knit that does not fray, then you could simply sew a center seam to the inner lining and leave an opening, like the first example here.

What about using strips of t-shirt fabric for ties? Seems to work well, but if you are using them in a design with a channel, consider sewing a seam across the channel so they don’t come out during washing.

What if I need to make a lot of masks fast? Our area mask making group is getting requests for lots of masks! If you have access to elastic, the Deaconess pattern is probably one of the fastest to make. There is also a version on the website with ties that would be a second choice. To speed up the process, consider making a pleating jig like this one or this one. Rather than make one mask at a time, do each step assembly line style, making 5-10 masks at once and doing all of the first step, all of the second step, etc. You can “chain” your masks at the sewing machine and not cut the thread between each mask as you complete each step.

A mask with the shaping across the center seam and channels for elastic or ties like this one or this one would be a little slower to cut out but also fast to sew. For these patterns, you could use fabric ties from t-shirts as illustrated in this pattern (which is also a quick pattern).

Introducing the River House Shawl

Introducing the River House Shawl

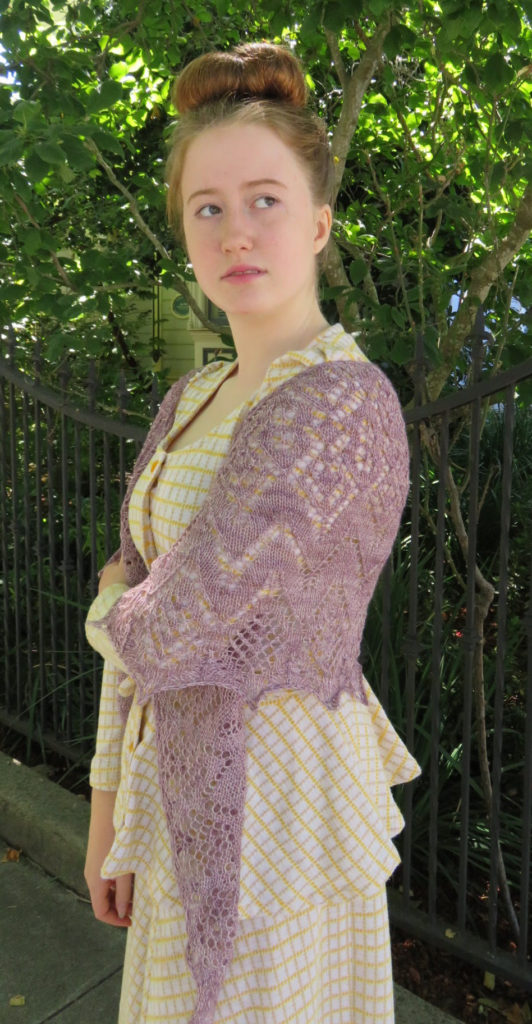
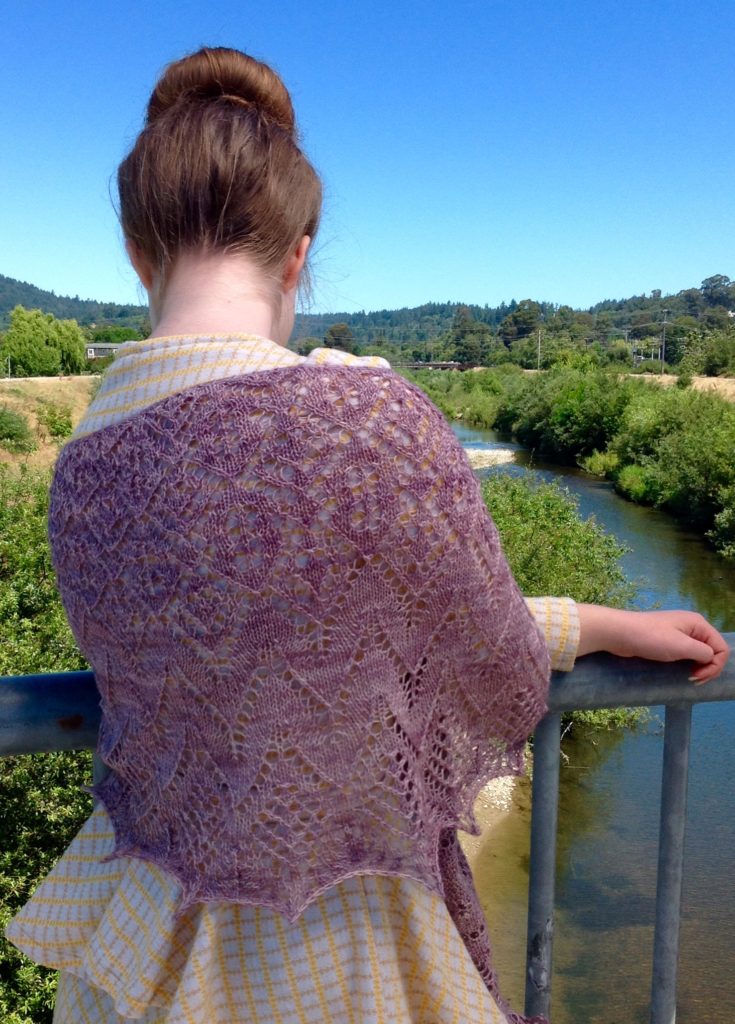
I’m excited to announce the publication of my new pattern, the River House Shawl.

River House is an elegant crescent shaped shawl worked in a cascade of lace patterns. It is worked top down with increases along the edges of both the right and wrong side rows to create the broad crescent shape. The pattern is CHARTED ONLY.

Two sizes are available– small and large– approximately 78”/198 cm(95”/ 241 cm) at widest point and 20”/51 cm(25”/63.5 cm) long at center. Small size is shown in the photographs. 

You can purchase River House Shawl on Ravelry, PatternVine, and LoveCrafts.

Introduction to The CSM Cookbook

Introduction to The CSM Cookbook

You can purchase The CSM Cookbook through Ravelry. The following is the introduction to the book.

This project started out as a way to keep myself organized.  I noticed that as I learned more and more ways to make socks on my CSM that I would get confused or over confident and start skipping steps.  I made myself some checklists so that I wouldn’t forget all the important steps to making a given type of sock but I kept them open ended so that I could use them over and over again.  From those lists came this “cookbook” of recipes that you can use on your sock machine. Think of this as a basic first cookbook – it contains twelve recipes for all of the most common circular sock machine styles with six socks that are “top down” and start with the cuff or hem, and six socks that are “toe up” and start with an extended toe that can be stretched across the cylinder for a seamless design.

There are some things I’m expecting you to know before using these patterns:

  • I’m assuming that you know how to set up your machine, adjust the tension, and get started on some waste yarn.  I refer to hanging a bonnet, but however you start a sock is fine.
  • I’m assuming that your cylinder is marked with half marks to divide the front and the back of the cylinder evenly and that both the front and the back half have target needles marked for making heels and toes.  
  • I’m assuming that you know how to do things like engage your heel spring and crank in both directions for heels and toes.
  • Since rehanging heel forks or v-hooks while making a heel or toe depends on your particular set up, there aren’t directions for when to do this.  Just move your weights when needed.
  • Finally, I’m assuming that you have learned how to clean your machine, time your ribber, and adjust your yarn carriage.

If you need help with any of those things, I’ve included some of the best online instructions and videos in the back of this book in the Resources section.  Once you have those basic skills, these checklists will help you put them together to make beautiful socks.

Once I started working on these patterns, I realized that there were other things a new cranker (that’s a person who uses a hand crank sock machine) might like to have, like directions for making gauge swatches or a worksheet to easily determine the rounds needed for a given person’s foot or illustrations for techniques I mentioned in the patterns.  Suddenly, I had a whole book, not just patterns!

I was introduced to circular sock machines as a hand knitter and knitwear designer, so you will see that I use hand knitting terms within this book.  Many of my hand knitting skills transferred easily to working with the sock machine, so I used those conventions as I wrote. The patterns are written in an open ended format so that you can customize the pattern to make the type of sock you want in that style.  Every pattern can be used to make anything from an ankle sock to a knee sock and from the most petite foot length to an extra long foot, just fill in the blanks to adjust the leg and foot as needed.

As in hand knitting, there are many ways to accomplish a particular result on a sock machine.  I’ve illustrated the methods that work well for me, but please explore other methods and find the ones that are right for you.

One final comment:  Part of the process of learning to use a sock machine is making mistakes.  These checklist style patterns will help keep you from making mistakes in completing all the steps of the process, but you’ll still have plenty of dropped stitches and other mistakes.  The video channels listed in the Resource section show many examples of how to recover from mistakes. When something goes wrong, I usually try to estimate how long it will take me to repair the mistake compared to just scrapping the sock and starting over.  My advice is to take on a learner’s mindset. Go slow at first, try new methods now and then, and enjoy the process of figuring things out!

Anatomy of a Sock

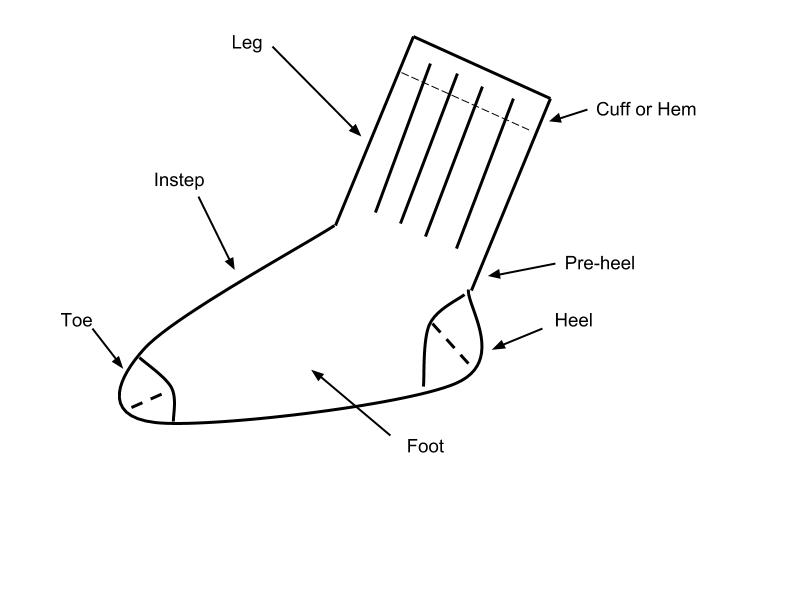
Included in this book you will find six different socks that start at the cuff or top hem and six that start at the toe.  Each recipe takes you through all the steps of making a particular type of sock. Below is a diagram of the basic parts of a sock, whether you work the sock from the top down to the toe or from the toe up to the top.  

There are a few distinctions between parts depending on the type of sock.  The very top of the sock is referred to as the cuff when it is ribbed and as a Hung Hem if the edge is folded over and secured on the inside of the sock.  A pre-heel is a part of the sock that is worked in smooth stockinette for the back of the heel so that the sock fits better and is more comfortable inside a shoe.  If the sock doesn’t have ribbing or mock ribbing on the leg, there will not be a pre-heel.

Purchase the complete 72 page ebook today!

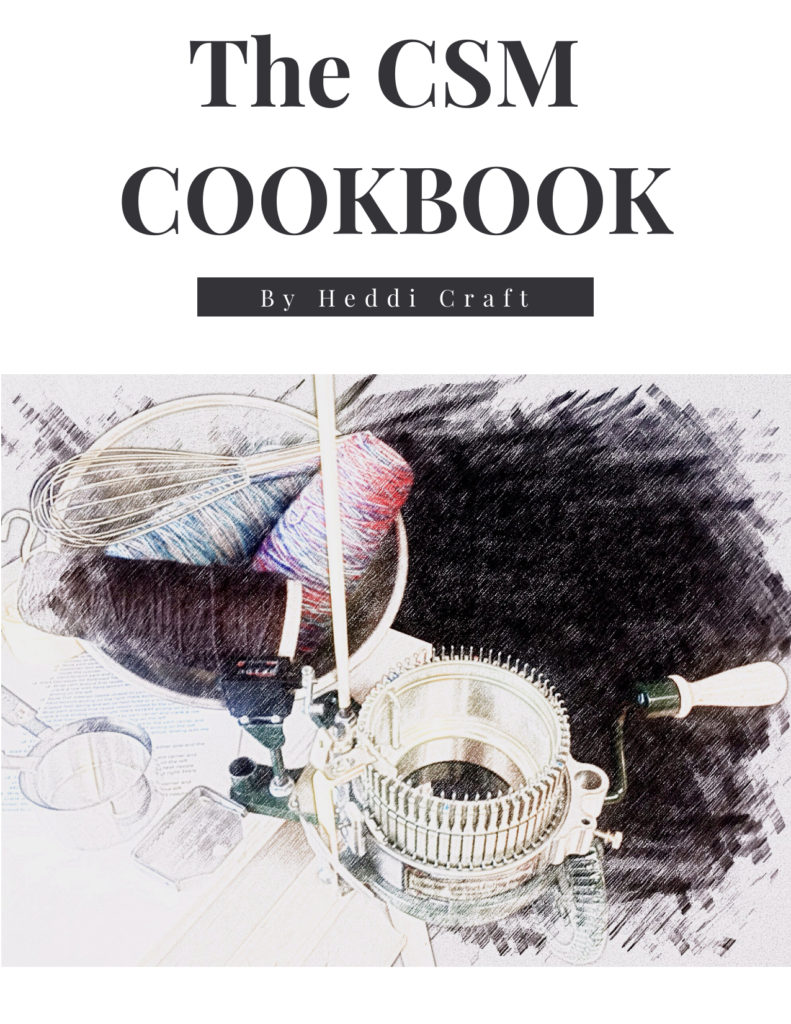
The CSM Cookbook

The CSM Cookbook

I’m so excited to announce a new ebook I’ve published called The CSM Cookbook! I’ve been working on this ebook for many months now and I consider it a basic first cookbook of checklist style patterns for the circular sock machine. The ebook contains twelve patterns for all of the most common circular sock machine styles with six socks that are “top down” and start with the cuff or hem, and six socks that are “toe up” and start with an extended toe that can be stretched across the cylinder for a seamless design.

You will also find chapters on making gauge swatches, sizing socks to fit your feet, an illustrated glossary of techniques, information on finishing socks, and a list of additional resources.

The twelve patterns included are:

Chapter 1 of the ebook is called Swatching for Gauge. I discuss all the things that can affect gauge, give directions for making a gauge swatch, explain how to do the math, and give you a worksheet for recording gauge information.

Chapter 2 is called sock sizing. I discuss the measurements you need to make great fitting socks, explain how to calculate how many rounds you need for each part of your sock, and provide a sock sizing worksheet you can use for each pair of socks you make.

Chapter 3 describes how to work the Quick and Easy Heels and Toes.

Chapter 4 is a ten page illustrated guide to common techniques and terms used in the patterns. If you are still learning about making socks, this chapter along with the resources in Chapter 7 will help you know what to do!

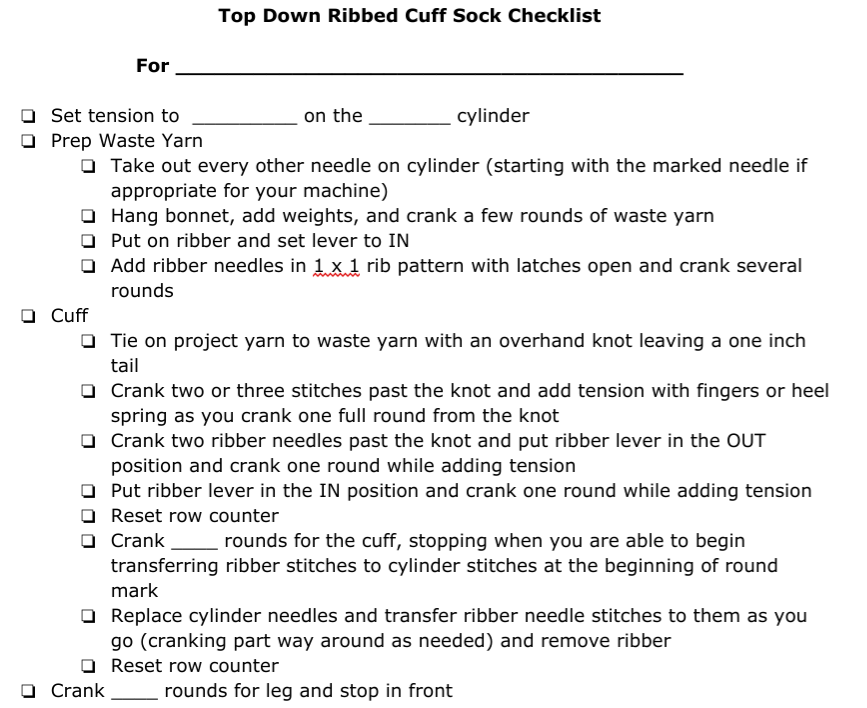
Chapter 5 includes all twelve checklists. These checklists are written in a step by step style so that you’ll never forgot to release your heel spring or stop in the front! You provide your own numbers based on swatching to make the socks the length and height you want. An example is shown below.

Chapter 6 provides links and tips for finishing both toe up and top down socks.

Chapter 7 is a list of additional resources, including video channels, links to manuals, and more!

All in all you’ll get 72 pages of information to make you successful in making socks on your CSM! Purchase and download it today!

Happy New Year 2019

Happy New Year 2019

Happy new year!  If you are a regular reader of my blog, I apologize for the long period of silence this fall.  This year I started teaching again in a 50% teaching position which seems to take 70% of my time!  I have really enjoyed being back in the classroom and I’m lucky to be working at a small school where I get to spend time with both younger and older students!

Now that my routine has settled there, I’m hoping to get back to regular blogging.  So let me catch you up on the knit-worthy goings on in the last three months!

I’ve been continuing to teach classes at Knit Sew Make, a teaching studio I started in the spring of 2018 with two other fiber artists.  For January and February, I’m teaching a Knitter’s Workshop class for self directed projects and a Crochet Mandalas class.  Check out our class registration website for a list of all our classes.

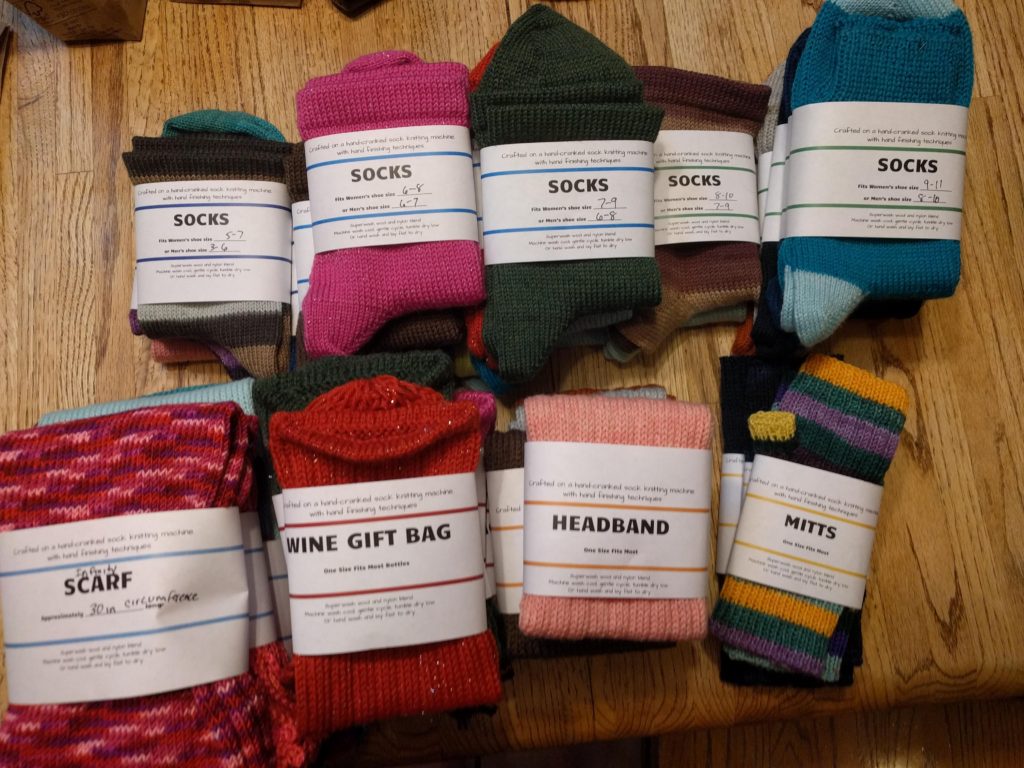
I also used my Erlbacher Gearhart hand crank sock machine to make over 50 items for our local Homeless Garden Project Holiday Store that benefits programs for the homeless here in Santa Cruz, CA.  I learned even more about what my sock machine can do and I’m planning to release some checklist style patterns for circular sock machines this spring.

I was a participating designer for the Indie Design Gift-A-Long and I helped moderate the Hands forum this year.  If you don’t know about this great event on Ravelry, join the group and keep your eyes open in late November 2019 for the beginning of the sale and Gift-A-Long.  It’s full of friendly people and starts with a sale of patterns from literally hundreds of independent designers!  I managed to complete three great patterns by other indie designers this year:  I made several Sheep Tape Measure Covers by Justyna Kacprzak as gifts, I completed the Sunstone hat by Triona Murphy, and I made the Christmas Tree Wrap by handmade by SMINÉ.

I also have FOUR new patterns that came out this fall!

The Simple Colorwork Mitts are an easy to knit pattern in worsted weight yarn that have three choices of colorwork for the tops of the mitts.

Lernen is a fingering weight lace shawl.  It’s perfect for beginning lace knitters as it gradually adds new stitches as you work the shawl.

Drachen is a oversized fit drop shoulder sweater that was published in Knitty Magazine.  It features a colorwork dragon motif around the hem.

Finally, the Stripes of Many Colors Cowl is the perfect way to use up the mini-skeins from a yarn advent calendar or any collection of mini-skeins or leftover yarn.  You’ll need about 135 yards of a contrast color to use throughout the cowl, but I think you will love the results!


In addition to the Gift-a-Long projects I completed, I also finished my Spanish Bay Cardigan, a pair of shortie socks that I gave as a gift, and my convertible poncho.  I started the Judah Cardigan just last week.

So although I didn’t find time to write much here, it’s been a busy three months!  You can also follow me on Instagram and on Facebook, where I often find time to make some quick updates!


On and Off the Needles for September

On and Off the Needles for September

This last month’s report will be a little slim as I’ve been working on some secret projects to be revealed in 2019.  However, I do have one new pattern release!  The Simple Colorwork Mitts are now available on my Ravelry store.  These mitts are a great way to use leftover worsted weight yarn and they come in three sizes with three patterns for the palm.  If you are a reader of my blog, you can get the pattern for 50% off using the code BLOGREADER at checkout!  Enjoy!

I’ve also been spending quite a bit of time working at my sock machine this month.  I’ve made several pairs of socks for my daughter (she picked the yarn from my stash and also worked on some preemie hats and a pattern for a wine bottle cozy.  I’m starting to make socks to give away or sell for the holiday season.  I also made a whole string of fingerless mitts that now need to be finished and have the thumbs hand knit.

I put in a few rows on my Star Wars Scarf, my Japanese Poncho/Cardigan, and my Spanish Bay is just a few woven ends in from being done!

Gauge on a CSM

Gauge on a CSM

A while back, I really got into using the ribber on my CSM and I looked at all the factors that affected how the ribber worked.  One thing I did was reduce the amount of weight I was using on my socks and suddenly my socks were coming out in unexpected sizes.  It got me thinking about all the factors that affect gauge when making a sock.  Gauge included both stitch gauge and row/round gauge.  Stitch gauge determines how big around the sock is and is usually measured in stitches per inch/cm.  Row gauge (sometimes identified as round gauge) determines how long the sock will be and is usually measure in the number of rounds per inch/cm.   Although there are various charts on the internet that claim to list the number of stitches and rows you will need to make a give sized sock on a given cylinder, the only way to really know your gauge is to do a swatch yourself and measure.

Here are all the thing that will affect your gauge:

Cylinder size: All the cylinders for a given sock machine are the same diameter and circumference (different brands of machines will have different diameter cylinders).  The difference is in how far apart the slots are cut for the needles.   Fewer needles mean the needles are spaced farther apart.  More needles will mean they are spaced closer together.  The yarn will run a shorter distance from needle to needle when the needles are closer together and a longer distance when they are further apart creating smaller or larger stitches respectively.

Number of needles used in the cylinder: For mock rib or for patterns worked every other needle, removing needles creates short strands of yarn in the space where the needle is missing.  These aren’t as long as the path going around a needle, but they are longer than the usual path between side by side needles.  Removing needles for mock rib or other patterns will tend to tighten the stitch gauge but may lengthen the row/round gauge.

Two sock yarn samples on different cylinders with different cam nut settings every 30-40 rounds.

Tension as set on the cam nut: The position of the cam nut determines how far down the needle pulls the yarn as it creates a stitch and makes the stitches “tighter” or “looser,” affecting both stitch and row/round gauge.  The cam nut is the main thing we usually think about when adjusting gauge, but it works in tandem with all the other factors listed here.

Using the ribber:  Knit and purl stitches tend to draw in when combined, giving a tighter stitch gauge when measured in a relaxed state.  Ribbing does stretch, though, and a stretched ribbed fabric will have the same gauge as a plain knit fabric if all the conditions of making it are otherwise the same.

Amount of weight hanging on the sock: The amount of weight hanging on the sock will affect how large stitches become.  Less weight means less pull and less yarn in each stitch.  More weight means more yarn can be pulled into each stitch.

Heel spring use:  The heel spring puts drag on the yarn, meaning that less yarn can get to each stitch because it’s being pulled taut.  That means both stitch and row gauge are generally tighter with the heel spring on.

Yarn used:  All fingering weight yarns are not exactly the same.  They will be of slightly different diameters which can fill the space between stitches and affect both stitch and row gauge.  The amount of nylon in the yarn, the twist or springiness of the yarn, and if you add a thread of lycra to the yarn will all affect the size of the stitches.  In addition, different colors of the same yarn may produce slightly different gauges because the dye in the yarn takes up space and can make one color “plumper” than another.

Method for winding yarn: Yarn coming off a ball will have slightly more tension on it than yarn coming off a cone.  Whatever method you use to prepare your yarn will add or subtract tension, changing your gauge.

Special patterning:  Cables, Fair Isle patterning, and slipped stitches will all change the gauge of a sock.  Cables tend to affect stitch gauge more and slipped stitches will change row gauge more.

Resting and washing:  The gauge you measure when a sock is fresh off the machine will not be the same as the gauge after the same sock has rested and been washed.  When the yarn has been under tension, it is much more stretched.  In addition, some yarns will “bloom” after being washed, which also affects gauge.  For a true gauge check, the sock should at the very least rest until it has relaxed to it’s “normal” state and should usually be washed to determine how washing changes the yarn.

Knit fabric is stretchy, so there is some range in which a sock will fit comfortably.  For consistent results in gauge and sock width and length, all the above conditions should be the same from one sock to the next.

Teaching Tips: The Beginner’s Mindset

Teaching Tips: The Beginner’s Mindset

Here’s a great way to become a better teacher: sign up for a class to learn something completely new that is outside of your previous experience.

If you are teaching knitting, you probably have been a knitter for a while and may have forgotten what it was like to learn to knit for the first time.  One of the biggest mistakes we can make as teachers is to assume the knowledge we have about our subject is “obvious” and skip over important explanations and steps in our teaching.

So go take a class outside your comfort zone.  Experience being a beginner taking a class from a subject matter expert.  Notice what the instructor makes easier by adding details for the novice and/or notice where the instructor makes assumptions about what you should know that you don’t know.  Where does the instructor go too quickly for the novice?  When does the instructor ask questions to assess student understanding and how do they tailor their instruction due to the responses?

Then the next time you teach a class to beginners or you teach an unusual technique, put yourself in the place of the beginners.  Think about what assumptions you are making about your learners and how you can confirm those assumptions are correct and what you can do if they are not.  What knitting moves need slowed down so the novice can follow them?  What details might you need to mention that the novice might not know?

Every time you teach a class, remember to put yourself in that beginner’s mindset.  Your students will thank you!  If you are using my teaching packs, you’ll find a list of common points of confusion for each lesson and how to handle it!