Wool Dyeing Experiments
I had a really great time this weekend doing a little wool dyeing experiment with easy to access materials and kitchen equipment.
It turns out that food coloring works well as an acid dye on protein fibers– we experience this ourselves when we stain our hands with food coloring. With the addition of an acid (white vinegar, in this case), food coloring makes a lightfast and washfast dye for wool yarn.
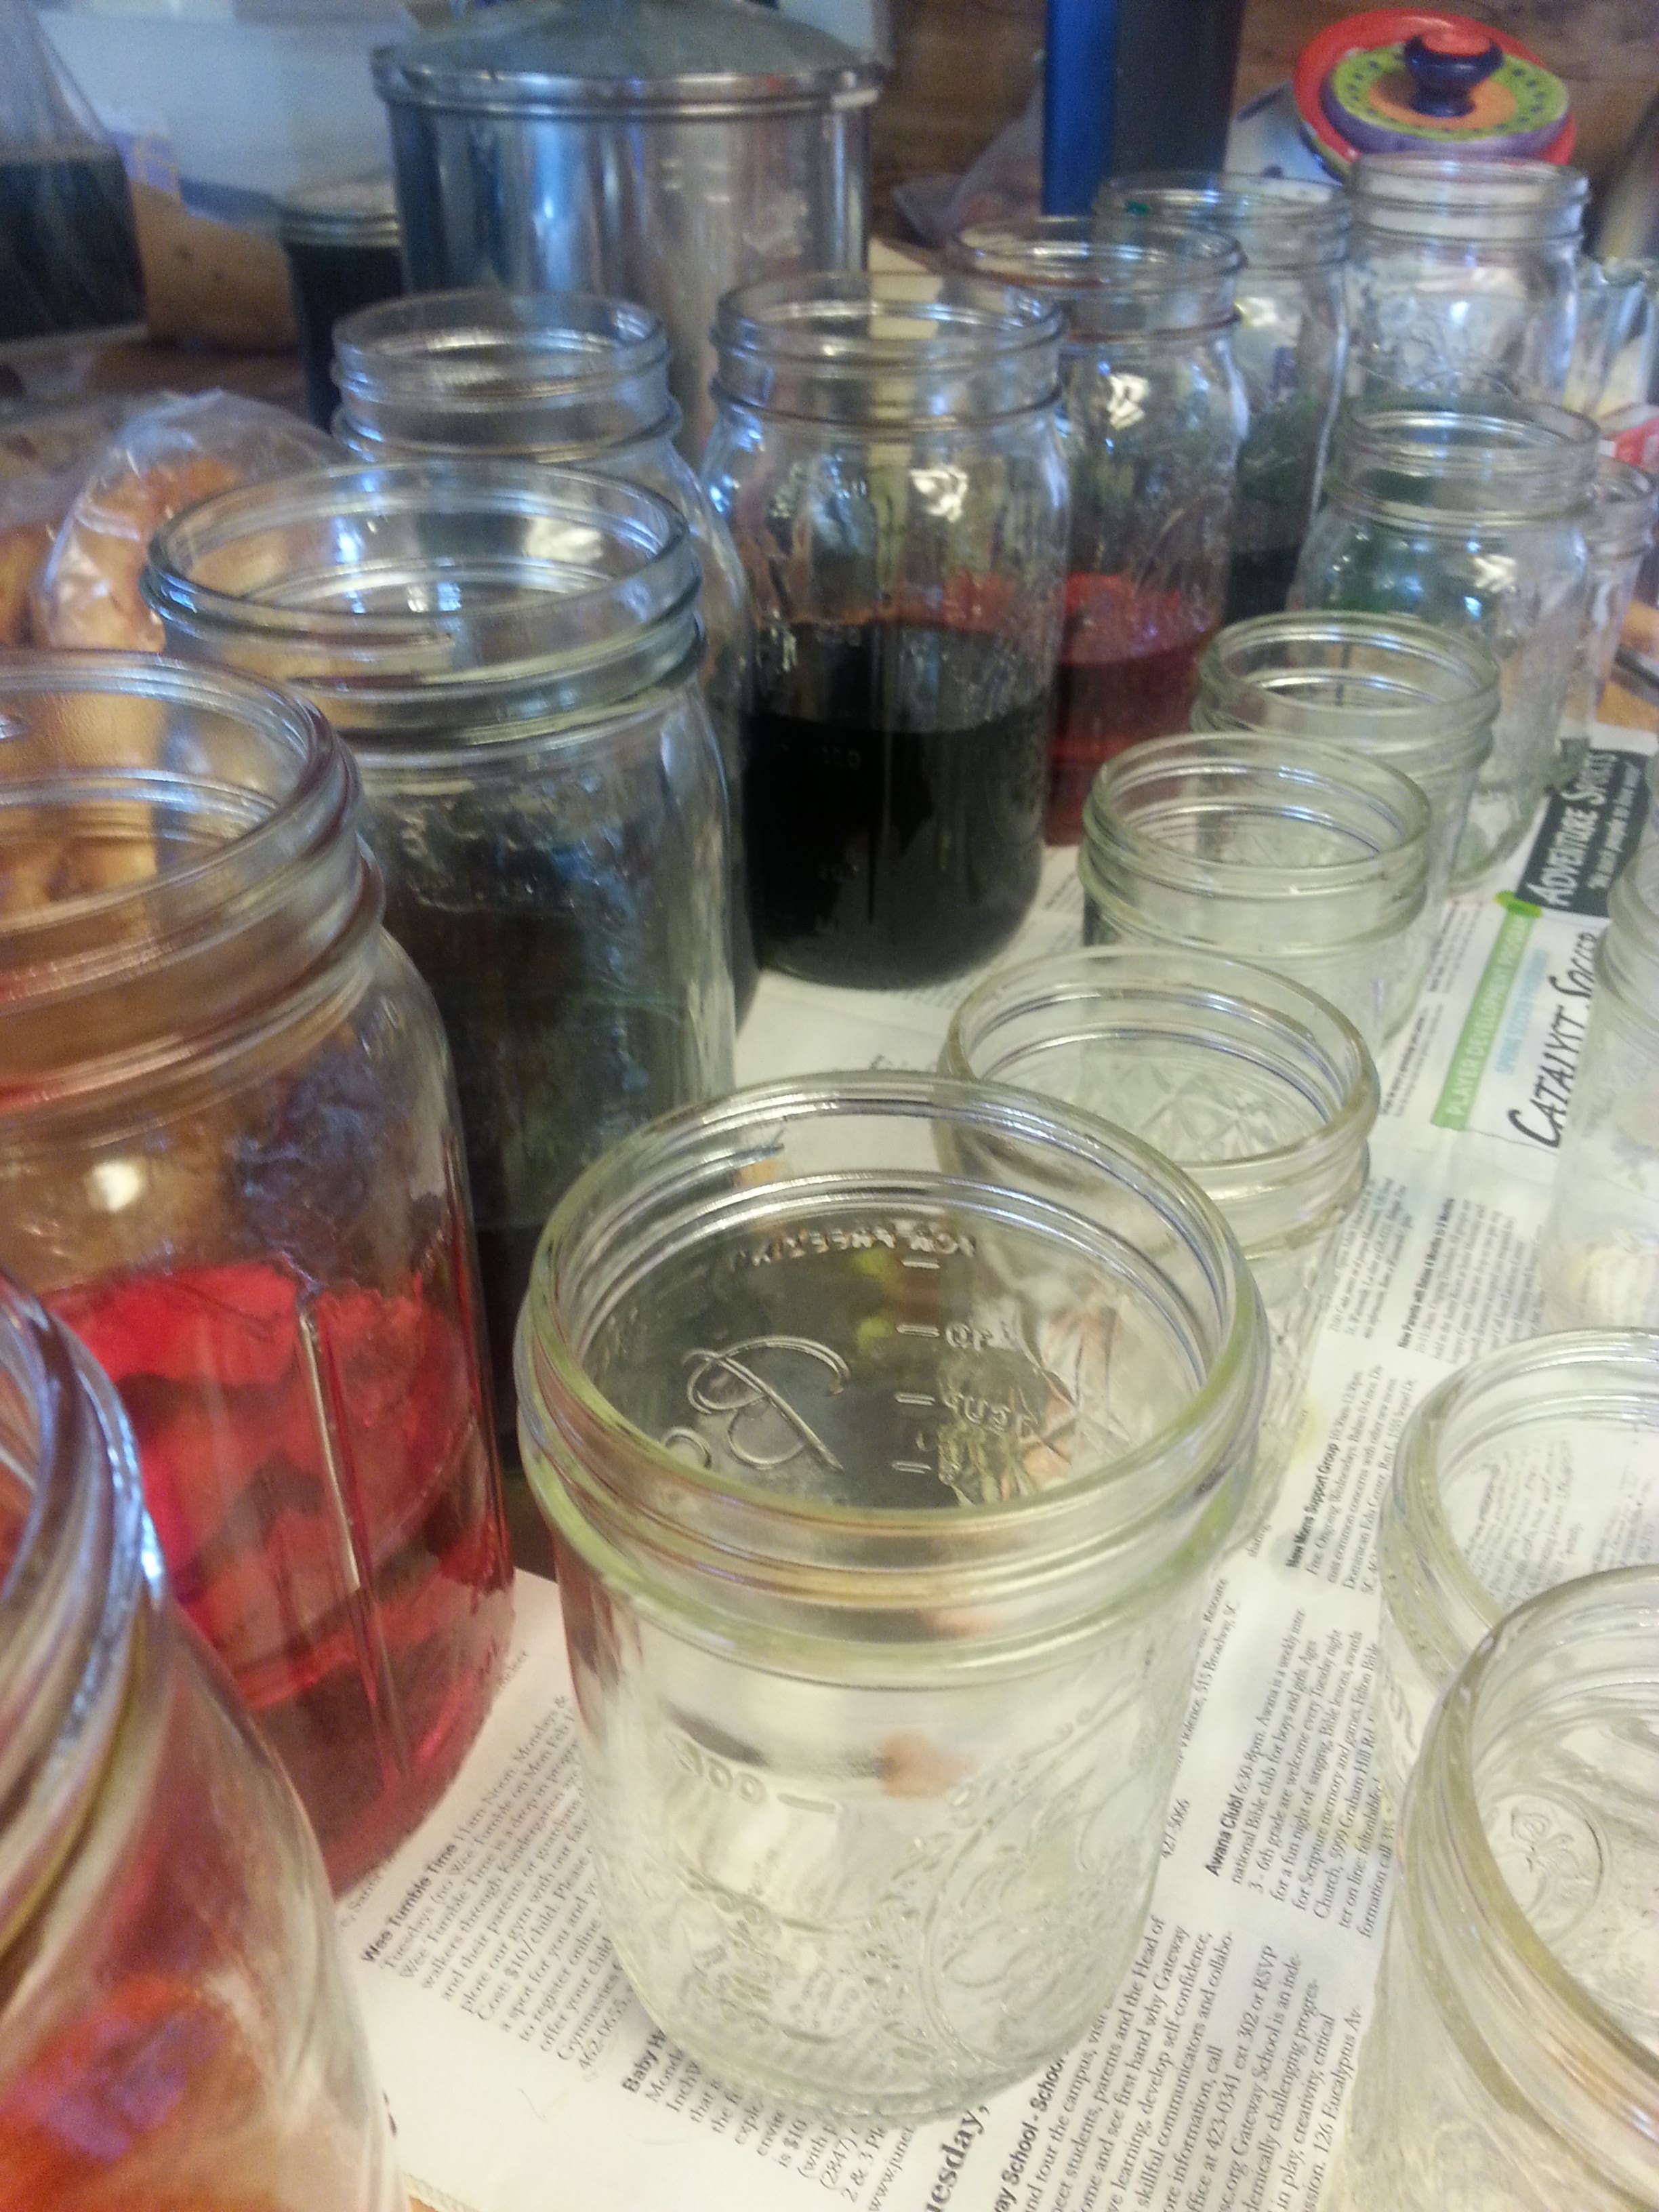
My experiments started with a ball of white Cascade 200 Superwash, which I wound off into approximately 4 yard hanks. I soaked them in a solution of 3 parts water to one part vinegar.

Meanwhile, I mixed solutions of food coloring with water according to the color experiment in the book Hand Dyeing Yarn and Fleece by Gail Callahan. Basically, I filled eight jars with 2 cups of water each. I had a box of both McCormicks Basic food colors and a box of McCormicks Neon food colors. Here were my measurements for the eight jars.
- 1 t. yellow
- 1/2 t. red
- 1/4 t. blue
- 1/2 t. green
- 1/2 t. neon pink
- 1/2 t. neon blue
- 1/2 t. neon green
- 1/2 t. neon purple
Why the different amounts? Gail doesn’t really talk about this but I know from dyeing fabric that some colors are stronger than others. Yellow is the weakest blue the strongest. The differences in dye amounts is so that one teaspoon of yellow solution can be treated as equal strength to one teaspoon of blue solution. Equal parts of each will make a nice middling green. If you mixed the water/dye solutions with equal amounts of food coloring you’d have to use about four parts yellow to one part blue to make a middling green.
I then used a modified version of Gail’s color wheel experiment (using half the amount of total liquid) to make a 12 step color wheel in the basic colors and again in the neon colors. The process was to put about 6 teaspoons total of the food coloring/water solutions into each jar and then squeeze out a yarn hank from my bucket and drop one into each jar. I’d stir it around a bit with a chopstick, but I accepted the idea that the the yarn would be a little variegated.

I let the yarn sit in the solution for about 30 minutes, then I microwaved the jars, four at a time, for 1 minute and then again for another 30 seconds or so until the water in the jar was clear and all the dye was absorbed. I pulled the hanks out and let them cool on a wire rack so I could use the jars for the next set of experiments.
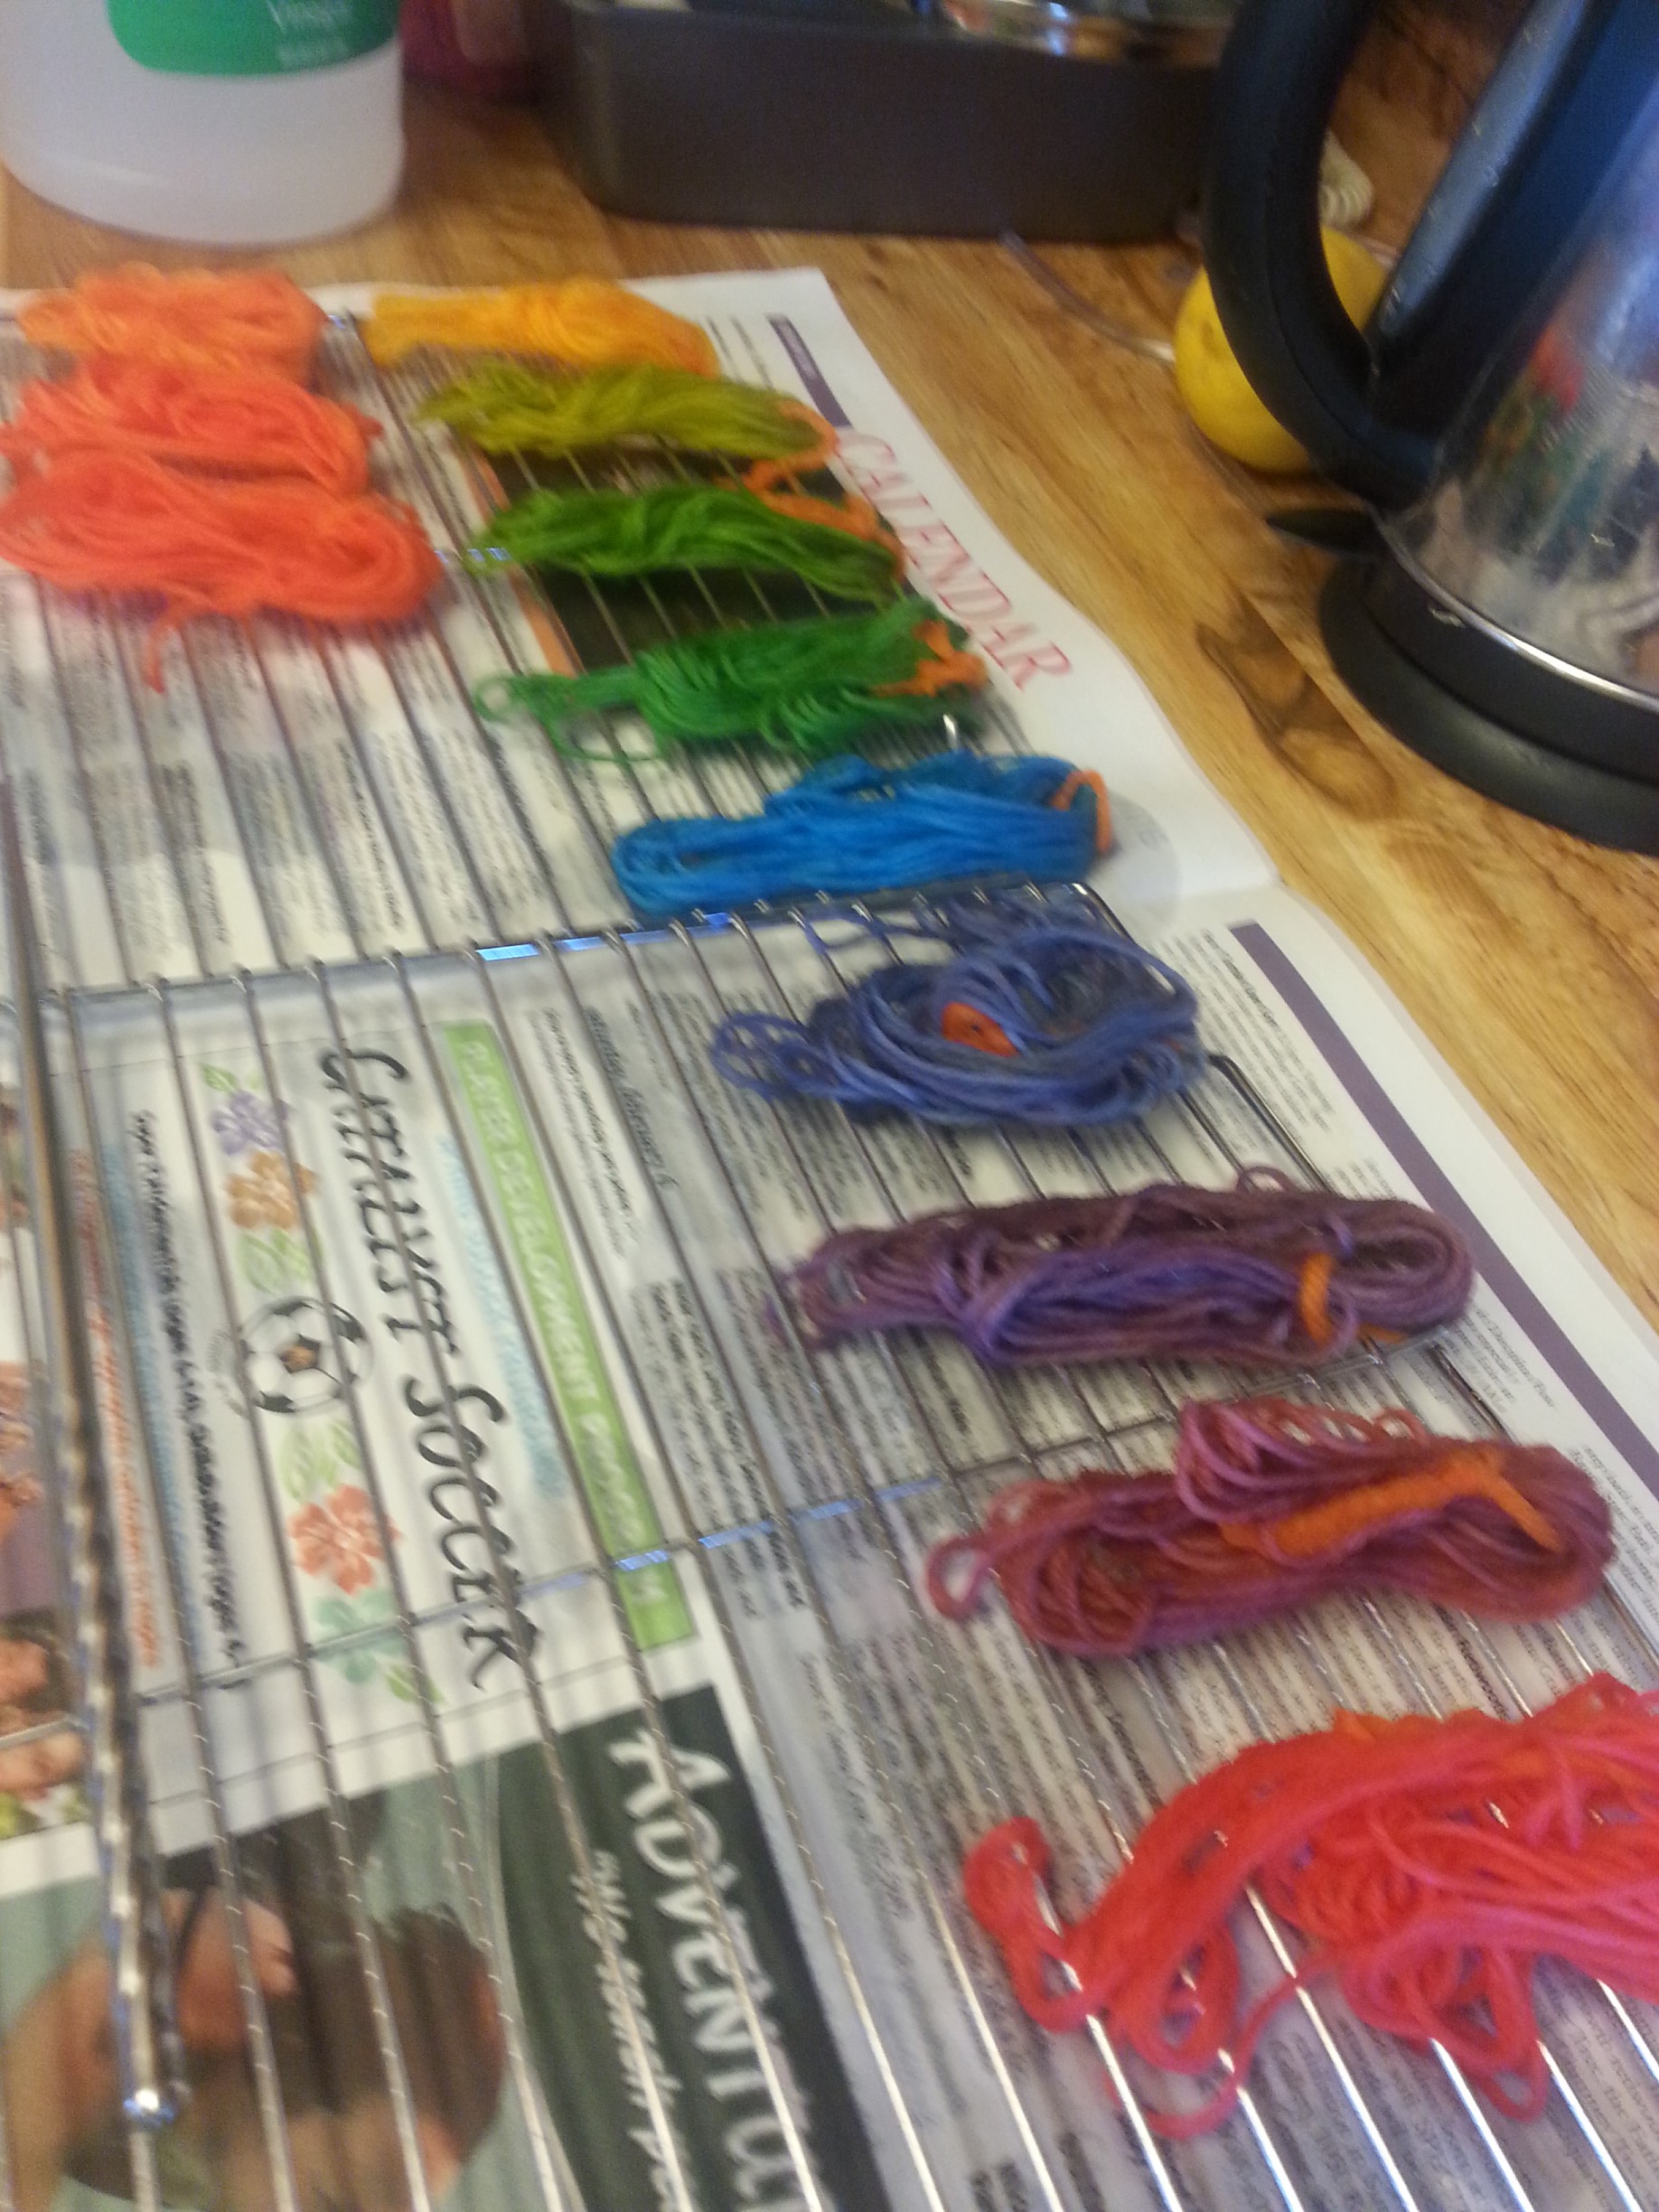
After the color wheels, I experimented with tints and shades. I made tints by using mostly plain water and just a little dye solution and I made shades by adding 1/2 to 1 teaspoon of the opposite color on the color wheel to each of the colors from a six step color wheel. I also made a full strength sample and a tint of the secondary colors I hadn’t used in my color wheel and I experimented with making some browns with two or three colors mixed.
In the end I had about 45 little hanks of yarn.
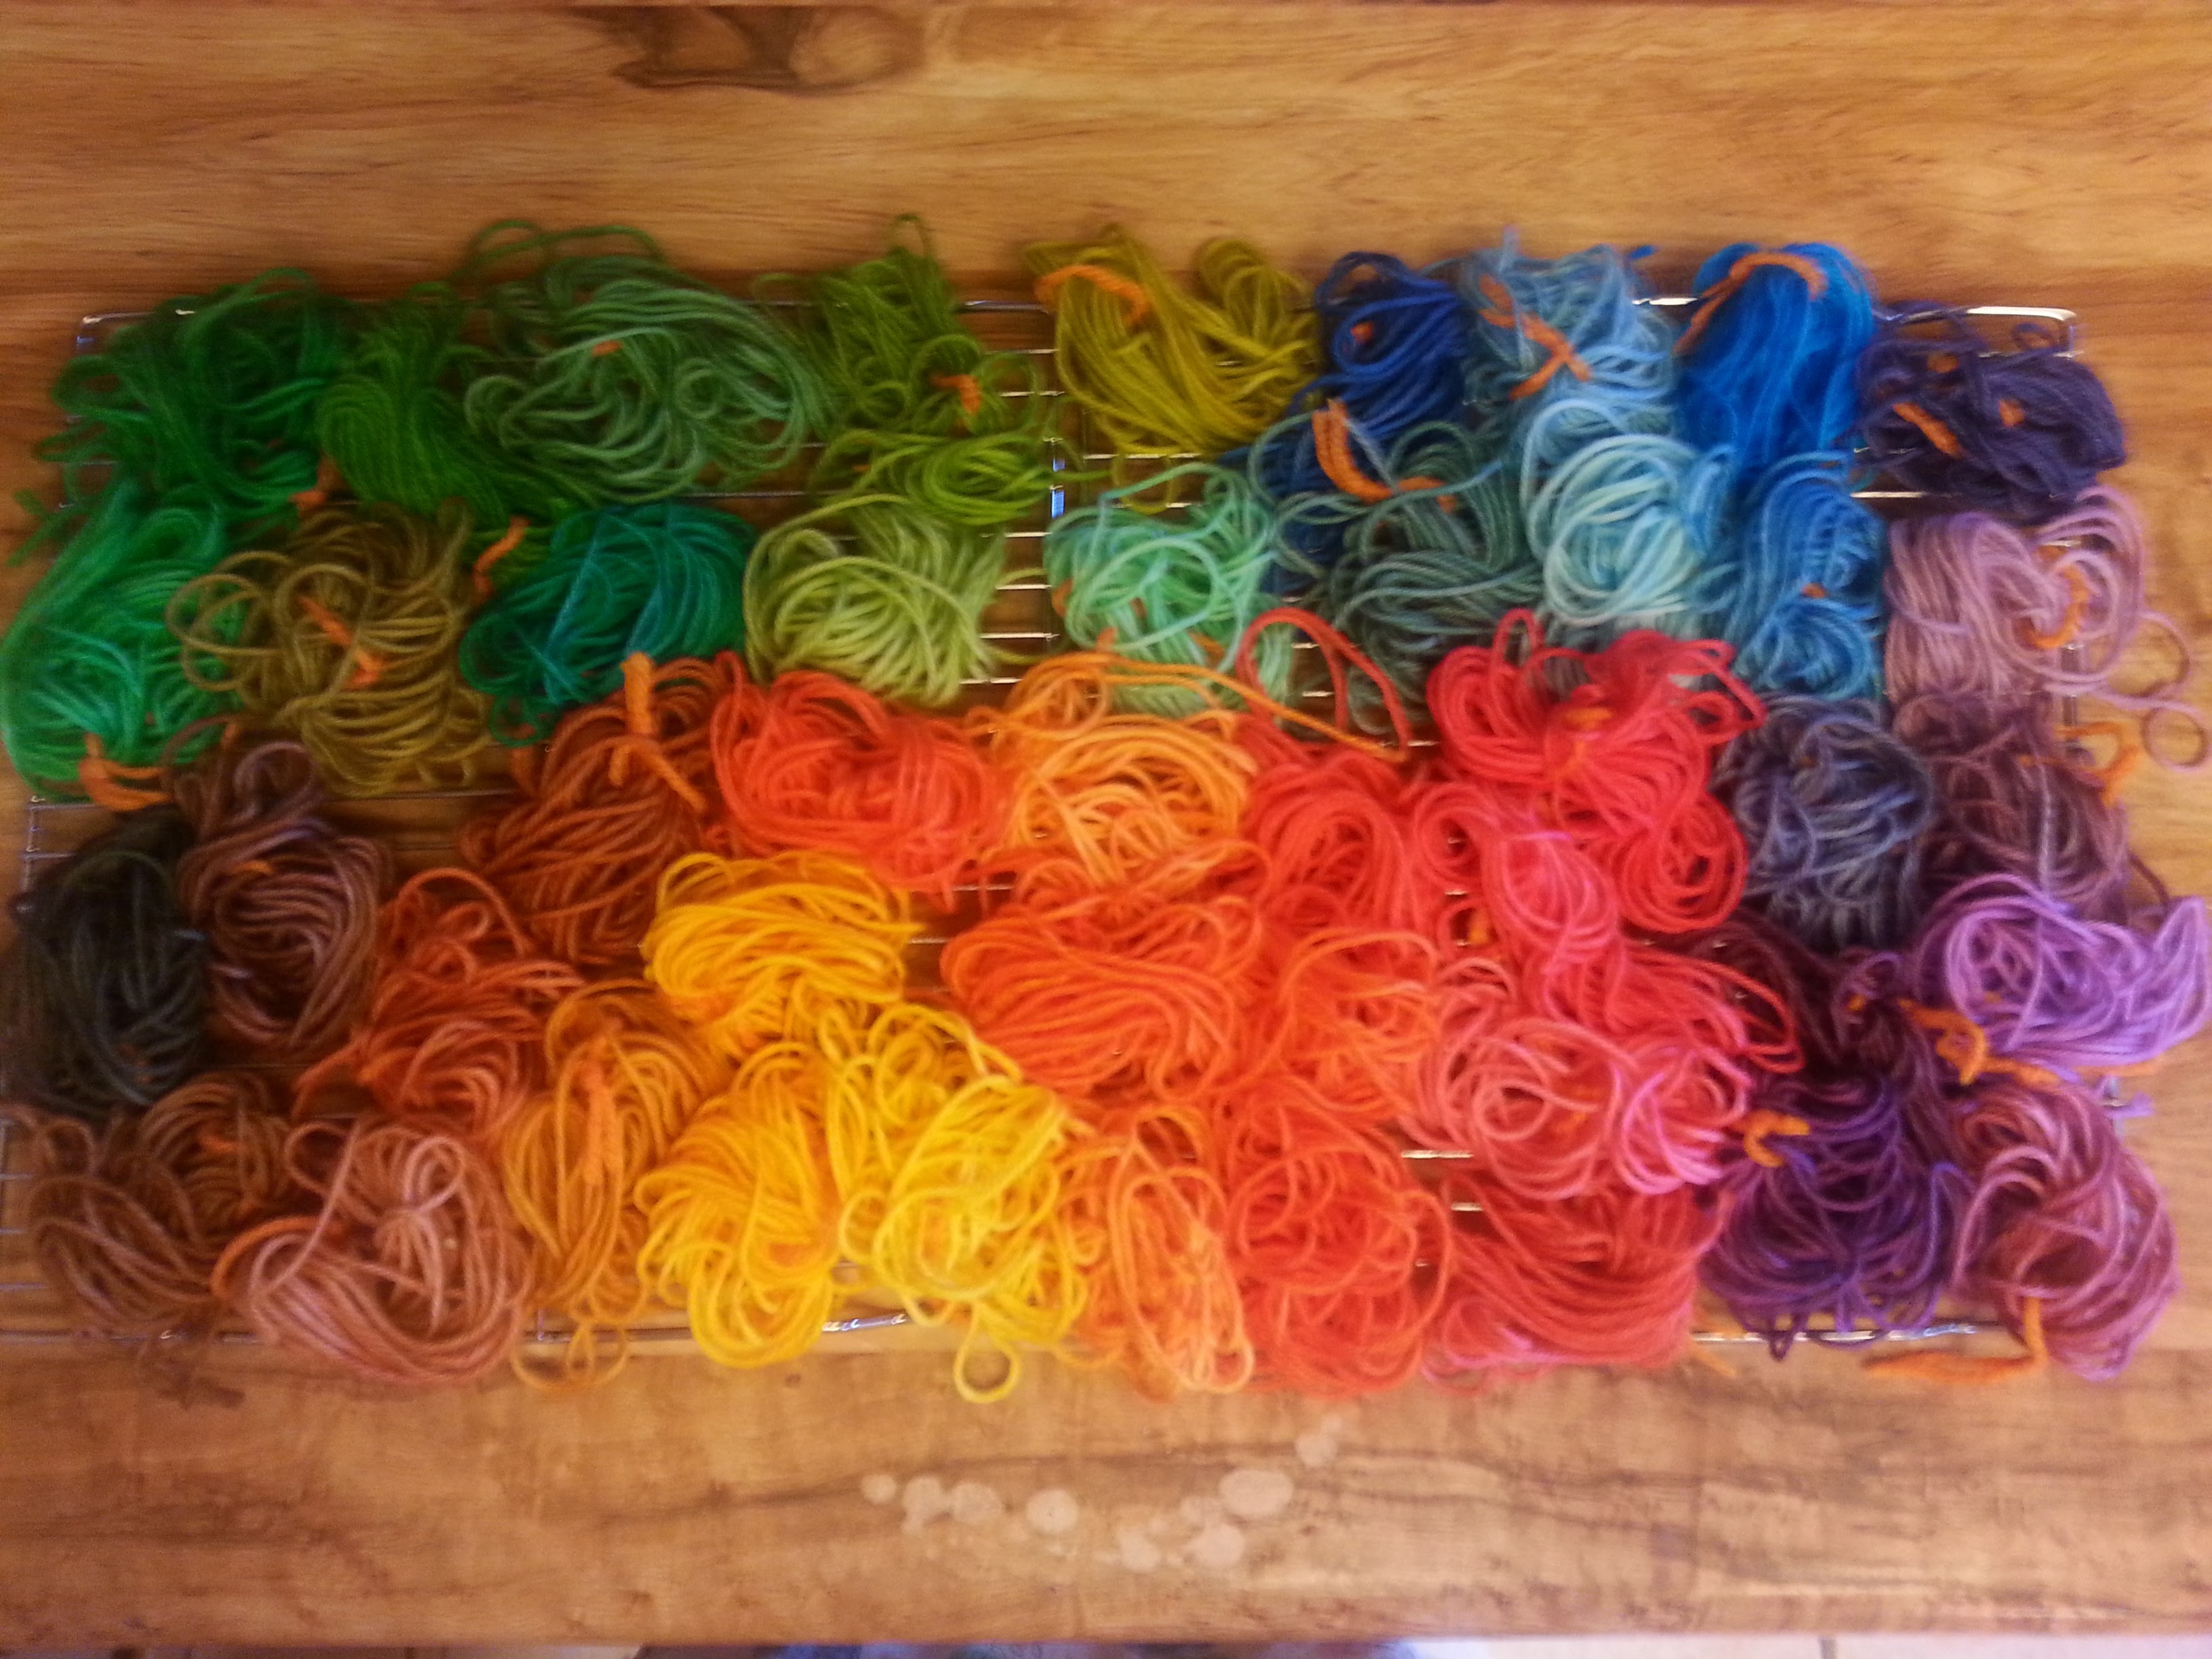
I could have kept going and played with more variations on tints and shades and experimenting with how saturated color I could get by adding more and more dye, but I ran out of yarn hanks and didn’t have more white yarn to wind up!
After everything was dry, I wound the little skeins onto clothes pins to make a tin of “yarn pegs” inspired by this post from Attic 24. Now I can play with my own little tin of colors!
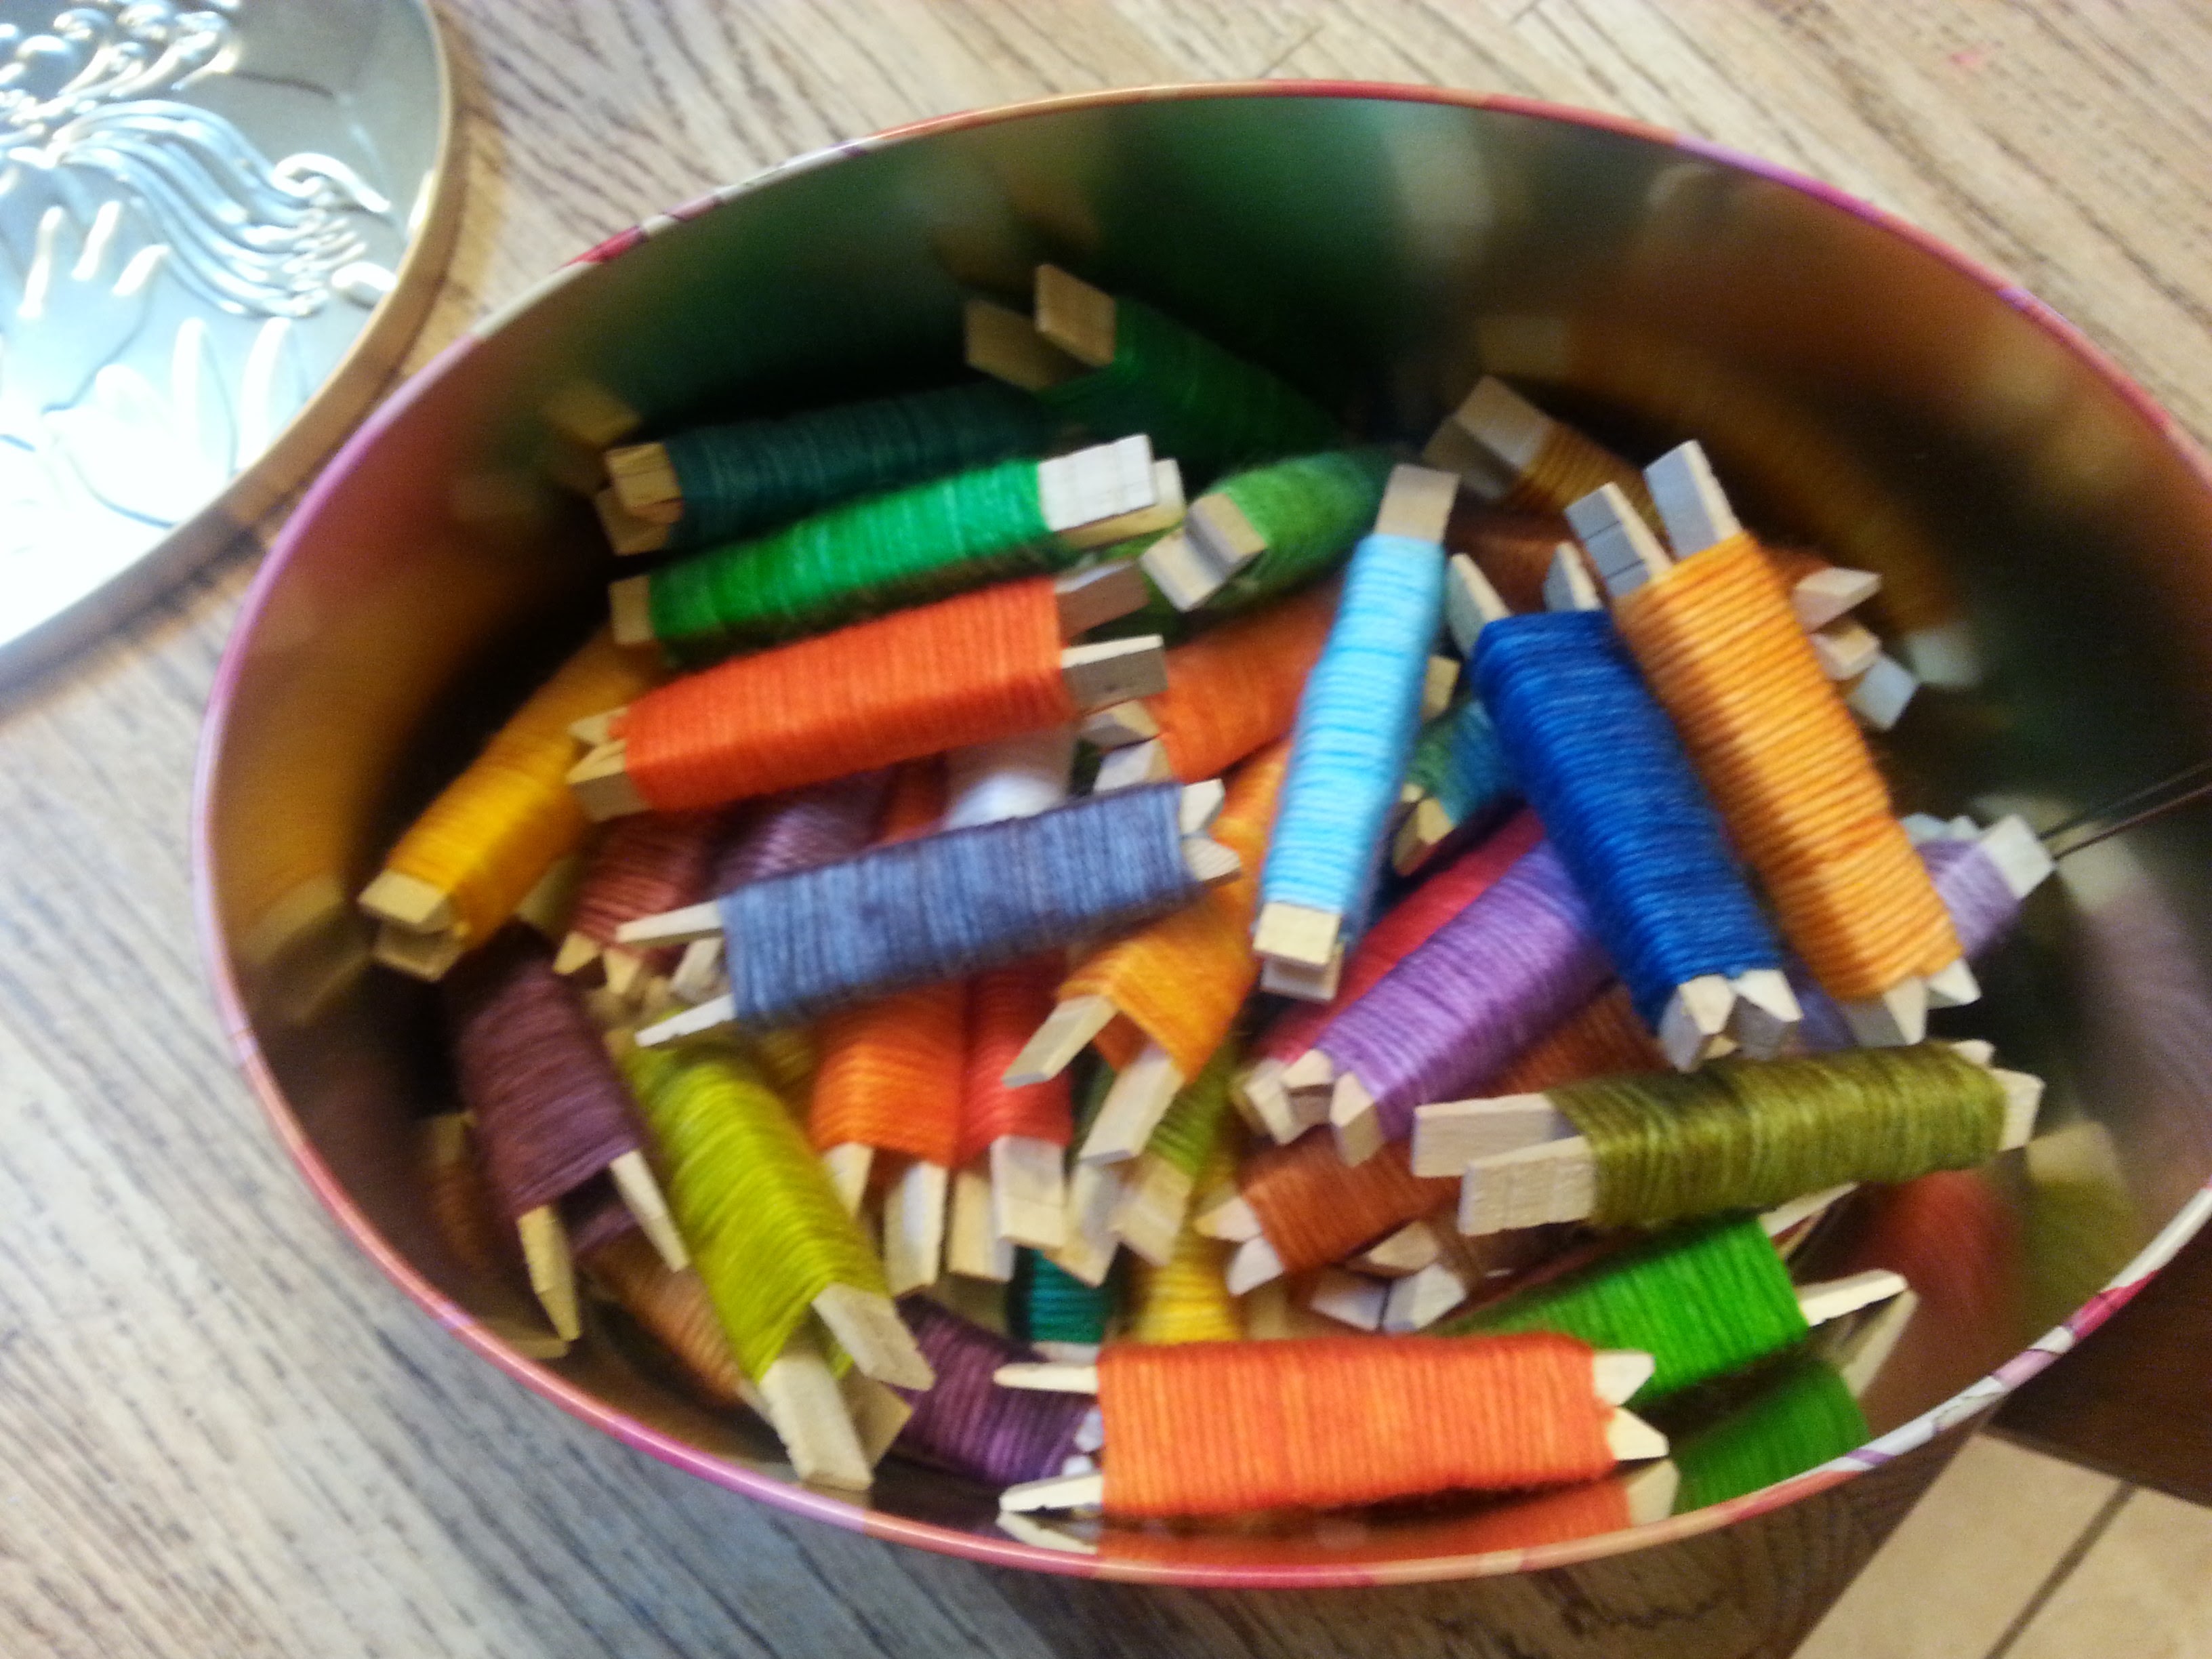
The best part about dyeing with food coloring? I could do it in my kitchen with minimal expense and worry. I got to play with color and make something beautiful!