This is just a quick little post for a useful link I found.
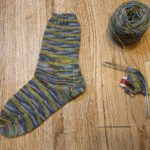
I just finished a project that required ten 50 gram skeins of yarn, which meant I had a lot of joins to make (nine, actually). I found this very clear and complete list of different ways to join the yarn. My favorites tend to be “Overlap and Knit Double,” the “Russian Join,” and “Just Knit with It.” For the last, I will weave in the ends later and have gotten pretty good at evening up the tension in a tightly knit garment.
Well, it looks like I didn’t get much done in February, because I spend most of my knitting time working on a project that’s under wraps and one that is very public!
It’s not exactly “on the needles,” but the public project is the launch of Knit Sew Make, and new community and learning studio I’m starting with two other fiber artist friends. We found a location on the west side of Santa Cruz, and we launched an Indiegogo campaign to help us with start up costs. We’ve got all kinds of classes scheduled and we are excited to create a place for fiber artists in Santa Cruz.
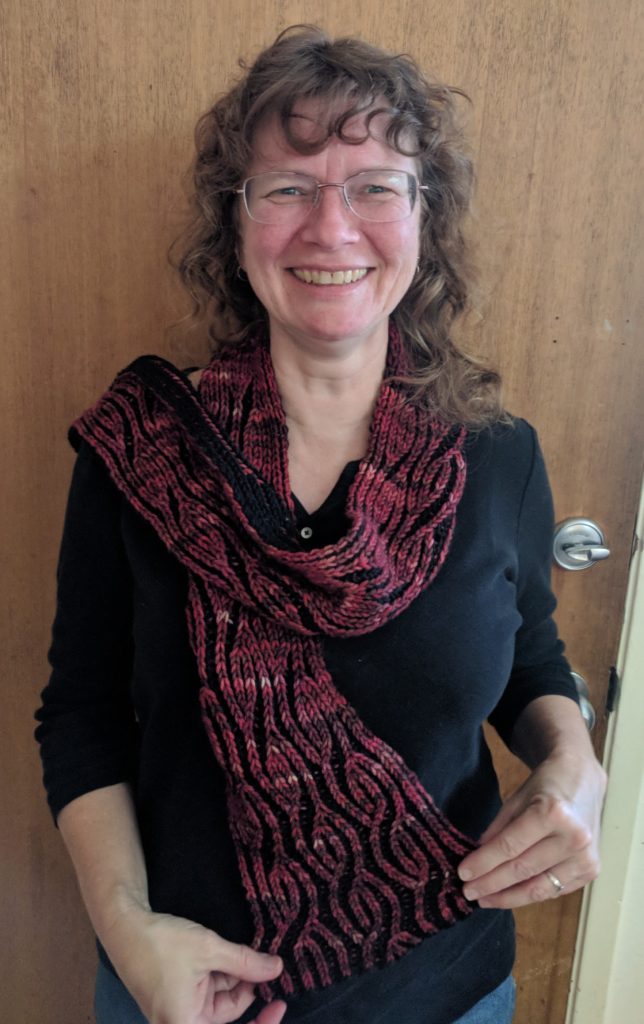
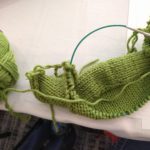
My Wynne Shawl and Featherweight Cardigan have been languishing, but I did finish my brioche scarf from my class with J C Briar in time to show it to her when I went to Stitches West last weekend.
That’s it for what’s on my needles this first week of March!
Here in the Bay Area, Stitches West is THE go-to event for knitters. Hundreds of classes and vendors over a four day weekend means non-stop knitting and crocheting fun! This year I was there a bit on Friday to shop and then took classes Saturday and Sunday. In between, I got to say hello to many friends!
My Saturday class was called Think Proportional…for Garment Design with Susan Lazear. This was a 6 hour class that started with looking at our own measurements and examining what they told us about our own proportions then moving on to analyzing how garments fit proportionately and how we could apply the same proportions of a garment to our own work. I’ve taken other classes about using measurements, but Susan’s emphasis on proportions really made me think differently about my design work! Susan was a great teacher and really tailored the talk to our needs.
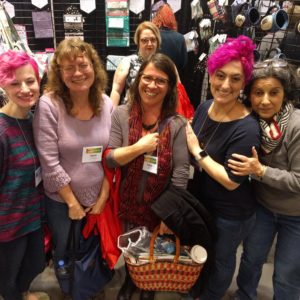
In between the two halves of the class, I got to meet the Knitmore Girls, my all time favorite podcasters!
On Sunday I took a class called Slick Set-in Sleeves with J C Briar. In that class we practiced making a top down no seams set in sleeve on a child’s cardigan sample and then learned how to adapt the same concept to other top down and bottom up garments that are written for sewn sleeves. She also gave us some hints for applying the technique to our own garment design. As with all of J C’s classes, this one was really well organized and informational.
I also attended the Student Banquet and Style Show on Saturday night where I took to the catwalk and showed off my Seacliff Beach Poncho! It was a fun event with lots of inspiring knitted and crocheted garments. You can see the photos of all the garments from the show on Facebook. I also won a prize for participating! Thank you, Stitches West!
When I begin to develop a new knitting class (or any class, for that matter), I always start with thinking about what exact skills I want students to be able to accomplish when they leave the class. For instance, when I teach my Knitting 101 class in which students make a simple mug rug, my goals are for students to be able to:
Identify basic pattern information.
Cast on and bind off.
Make knit and purl stitches.
Move between knit and purl stitches in a single row.
Identify some of the mistakes in their work.
I have a particular way of thinking about how to write those skill statements. I always start off with a verb that I can mentally assess as I work through the class. Something that I can actually see happening– identify, make, move between, cast on, etc. I use verbs that describe what my students can do by the end of the class, not what I’m doing. And I try to be specific about what I’m expecting, for instance “in a single row” or “some of the mistakes.”
Once I’m clear on what the students need to accomplish, then I plan how I can help them be able to do those things. For instance, in Knitting 101, my first goal is for students to be able to identify the parts of a pattern before they even start knitting because after they take this class, they are likely to look for a pattern to make that’s more exciting than a mug rug. So after I’ve explained the basic information found at the front of a pattern, I give each student a different pattern to look at, and ask them to find the materials, gauge, key, etc.
I find that if I put my attention on what the students should be doing during class, that my classes are more active and that they tend to be more focused. Next time you are planning a class, start with thinking about what specific skills or knowledge you want the students to leave with and use those to plan what demos to use, what stories to tell, and what exercises students should complete.
In November at Vogue Knitting Live in Seattle, I came across a new DPN style by Addi called FlexiFlips. These are similar to the Neko Strickespiel curved DPNs that I reviewed early last year in that there are only three needles in a set. The difference is that instead of being in a fixed angled shape, the FlexiFlips have a short cord between two metal needles. This means they can go from straight to a tight angle and back as needed. They are pretty spendy– around $24 from most retailers for a single set of three needles– so I purchased a single set of size 1 needles for hand knitting socks.
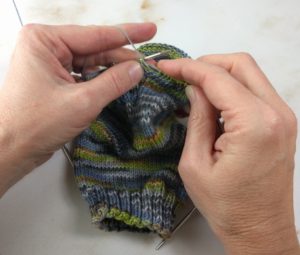
I’m about half way through making my second sock with the needles and I can say that I will definitely use them again for another pair. Their flexibility gives them a distinct advantage over the Neko needles. I am having little to no problems with laddering and the flexible shape of the needles makes them easier to adjust as you work. Like the Magic Loop method, these needles only require two changes in a round, rather than the three or four you’d have with regular DPNs. Unlike Magic Loop, you won’t need to manage a long cable and these are very easy to tuck into a purse or pocket. You may have to adjust the directions to you pattern a bit if it’s not needle agnostic, but if you are used to doing this for Magic Loop already, it shouldn’t be a problem. Patterns that are designed for Magic Loop can easily be completed with the FlexiFlips.
Beginning the round with the third needle.
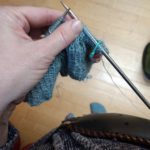
For the fastest speed on the leg and foot of a sock, I like using a very small eight or nine inch circular because there’s no needle changes at all, but the small circulars have very short needle lengths and they can fatigue my hands more quickly than DPNs. The FlexiFlips have a longer needle length overall so they are easier on my hands and I don’t have to carry an extra set of DPN’s for heel flaps or toes as I do with the small circular.
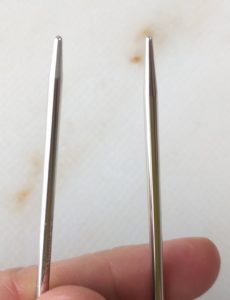
My one criticism of the FlexiFlips are the needle tips. They have the design of one blunt needle and one sharper point. Each time you have worked all the stitches off a needle you have to consciously think about how the empty needle goes back into your right hand so that the preferred tip is ready to use. I prefer pointier tips in general, and especially can’t think why I would want a blunt tip in a needles sized for sock knitting. Sadly, when working back and forth for short rows, that means one tip is going to be blunt and the other sharp if you’ve be orienting the needles the same way each time. Either that, or you have to slip the stitches so that you have the pointy tip going in the right direction for both needles as you do your short rows or think ahead during the last round before the short rows. Many patterned stitches use both needle tips to manipulate the yarn, and again, I find having to always have the left hand tip be my non-preferred style to be a nuisance. If I could get a set with sharp tips on both ends of the needles, I’d be a much happier knitter!
Blunt tip, left, and pointy tip, right.
Overall, I’d recommend these needles. They combine the ease of the Magic Loop method with the compact feel of a small circular or DPNs. If you do a lot of complex patterning on socks, they might not be the best choice because of the tips, and they won’t work for larger circumferences like that of an adult hat. They are comfortable to use and work well for socks or close fitting sleeves.
Friday afternoon, I sat down on the couch and realized that I was surrounded by knitting bags! Here’s what’s on the needles in this first week of February.
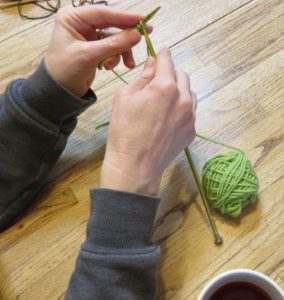
Last month, I started working on the CustomFit version of the Featherweight Cardigan. I’m using Knit Picks Alpaca Cloud Lace yarn and I’m using this project to learn to knit on a knitting belt! I’ve got about five inches of the back completed and I’m getting faster. My goal is to be able to walk and knit using the knitting belt, but so far, I can just meander between the kitchen and the living room.
Last year at Stitches West, I took JC Briar’s class on Beginning Brioche. The handout included a chart for us to practice our increases and decreases and shortly after the class I got some Malabrigo Rios in Black and Jupiter and started the chart as a scarf. As Stitches West is coming up again at the end of the month and I have another class with JC (this time it’s Slick Set In Sleeves), I thought I’d try to finish it before the show.
I’m continuing to make progress on my Wynne Shawl by Sarah Jordan. I started this as part of the Indie Designer GAL on Ravelry, but realized after Christmas I couldn’t finish it by the deadline and that its long rows of garter were so great as a knitting group project. I bring this with me to my Saturday knitting group and to guild meetings and it will get done eventually.
I’m working on the second sock of a pair from the pattern Vanilla is the New Black by Anneh Fletcher. It has an unusual heel construction and I’ve been using the p
attern to try out the Addi Flexi Flip needles I got at Vogue Knitting Live in Seattle. I really like the pattern and it makes a nice heel that’s good for a high arch, but is easier than working a heel flap and gusset. The needles are similar to working with Magic Loop and a bit easier than three or four DPNs.
Finally, I’m working on a secret knitting design that should be complete in the next few months or so. More details on that when it comes out!
On the CSM, I’ve completed a few more pairs of socks and made a hat from a double layer of laceweight yarn. You can find the details of how I did that on my Ravelry project page.
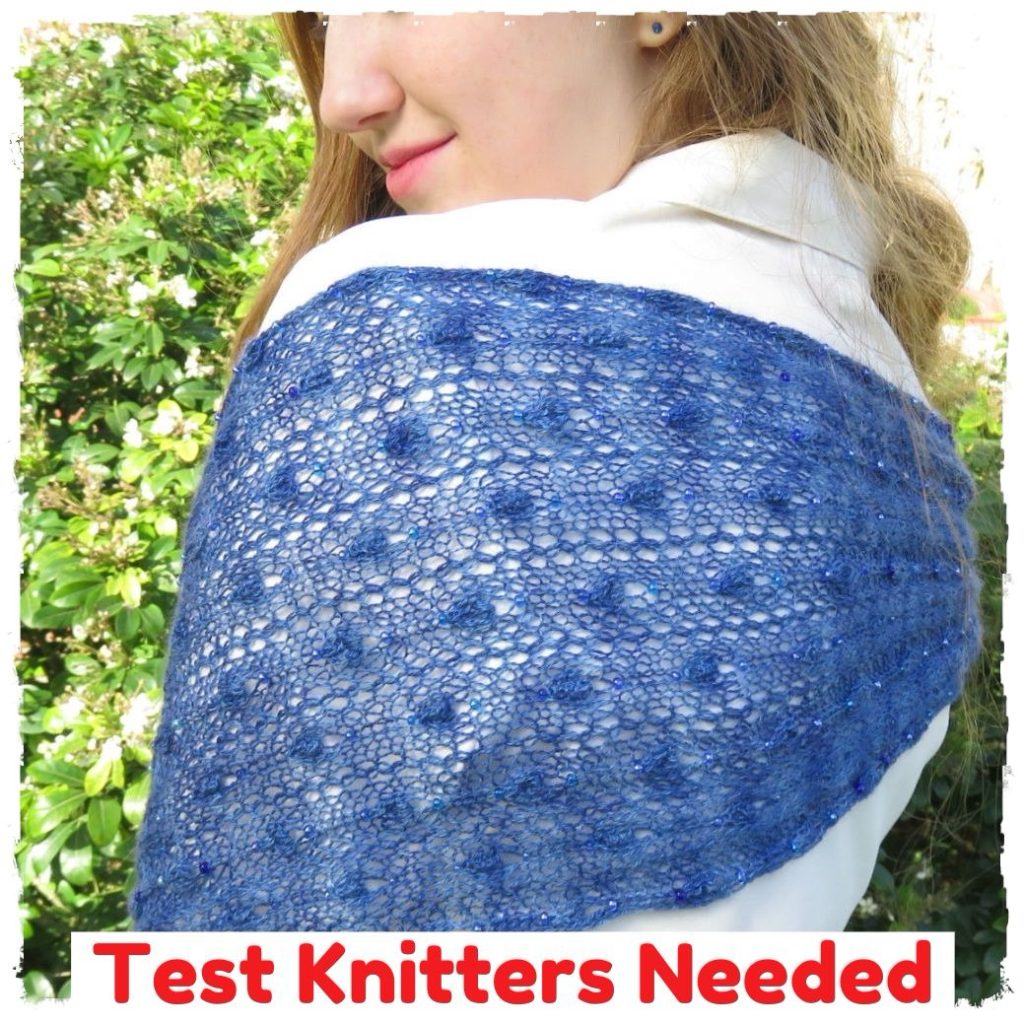
I’m looking for test knitters for a new stole. Worn as a scarf or stole, Sinine is a lightweight, lacy garment to add grace and sophistication to your wardrobe. Beads, bobbles, and fringe accent this fully reversible rectangular garment. The pattern is adjustable in both length and width, and can be worked with or without beads.
The test knit runs through February 22, 2018. If you are interested, you’ll need to be a Ravelry member. You can find full details of the test knit here on my Ravelry group.
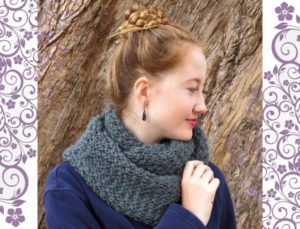
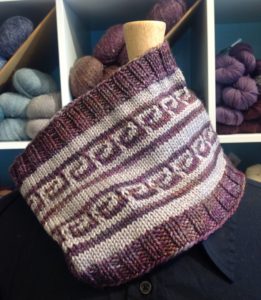
I have two new pattern releases from October. First is a free cowl pattern published on the Underground Crafter blog called the Meander Cowl. This is a quick to knit design that uses slipped stitches to create the colorwork pattern, so you’ll only use one color of yarn in each round. You can find it free on the Underground Crafter blog.
My second pattern from October is a little Cabled Phone Cozy. This pattern is a great introduction to cables and it showcases a special button. It also makes a quick to knit gift for someone special. You can find it for sale on Ravelry.
Speaking of sales, the Indie Gift a Long starts tomorrow. Over 300 participating indie designers have thousands of patterns on sale for 25% off through November 28th, 2017. Then you can join in knit and crochet alongs for the rest of the year and win some great prizes! Check it out! You can find my patterns for the Gift a Long in bundle on Ravelry.
The Vihm Cowl is squishy, slip stitch pattern worked in three skeins of Knit Picks Mighty Stitch Bulky. It has a great teardrop texture on the front and a more striped but still interesting texture on the back. It’s a great pattern to keep you warm all fall and winter!
I just finished a draft of my first five size, fitted, top down sweater pattern. I’ve made a few multi-size patterns. My Gynnes Cardigan has two sizes, but that only required changing the back width and a bit of thought to the sleeves. I also have a hat pattern in three sizes, but again, that was just a matter of changing the circumference and aligning it with the pattern repeat.
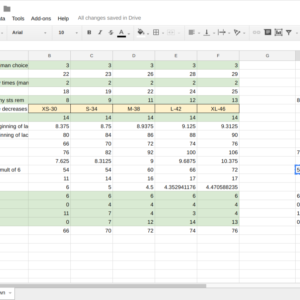
This was a bit different. Five sizes from XS to XL, fitted with waist shaping, and including some border lace with a six stitch repeat. Also a top down seamless construction, so I had to calculate the sleeved cap knit in short rows. I started by making a very detailed spreadsheet with over 150 rows that calculated each and every major number for the pattern.
I used main two resources to do this. First, in 2015 I took JC Briar’s very excellent Manage Those Numbers class at Stitches West and her handout and my sample spreadsheets from the class helped immensely. I especially appreciate the concept of making everything possible a formula off of key numbers so if you change those numbers everything else changes along with it (more on that in a minute). She was also great about pointing out some key functions that make pattern writing easier.
Second, I used Faina Goberstein’s Craftsy class Sizing Knitwear Patterns. From it I learned quite a bit about how to organize my spreadsheet and use color to keep track of sizes and which numbers would go in the pattern and which would not.
Discussions from the designer’s forums on Ravelry gave me some other clues and putting it all together was a multi-day job. Then I spent a few hours transferring those numbers to the pattern and writing out the directions as I referred frequently back to similar sweater patterns to make sure I was following the right conventions. It was exhausting but fun to really dig in and apply some new skills. At one point I realized I had not doubled a number that I should have and made sure it fit with another multiple later, but once I made the change to the key numbers, everything else just cascaded into place and a whole section was correctly updated.
The pattern is under wraps until spring, hopefully I’ll be able to give some sneak peeks along the way!
 On Sunday I took a class called Slick Set-in Sleeves
 When I begin to develop a new knitting class (or any class, for that matter), I always start with thinking about what exact skills I want students to be able to accomplish when they leave the class. For instance, when I teach my Knitting 101 class in which students make
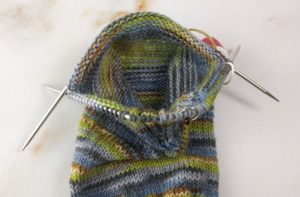
 Last month, I started working on the
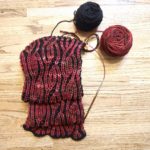

 I have two new pattern releases from October. First is a free cowl pattern published on the
 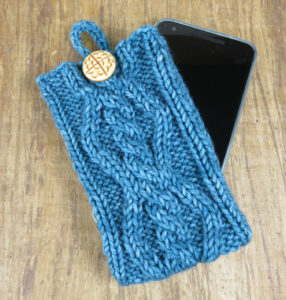 My second pattern from October is a little